How to Adjust a Rear Derailleur
Most bad shifting is one barrel-adjuster turn away from fixed. Here's the sequence, in the order Shimano's own service manual gives it — and the one step everybody does out of order.
Heads up: we earn a commission if you buy through the links on this page, at no extra cost to you. It never decides what makes the list — here’s how that works.
Stephen has adjusted a lot of rear derailleurs, and got it wrong for years in a specific, common way: he treated the limit screws as the fix for bad shifting. They aren’t. The limit screws stop the chain leaving the cassette at either end; they do essentially nothing for how the gears change in between. Almost every “my shifting is rubbish” problem is cable tension, and it is adjustable by hand, in about thirty seconds, without a tool.
So the order below matters more than any individual step. It is the order Shimano’s own dealer’s manual (DM-RARD001-04, covering DURA-ACE RD-R9100, ULTEGRA RD-R8000 and 105 RD-R7000) puts them in, and it is not the order most people work in. We fetched that manual and every figure quoted here comes from it — not from memory, and not from another website’s retelling.
One honest caveat before you touch anything: this is a road-derailleur procedure from a Shimano road manual. Your derailleur may be SRAM, may be electronic, may be a different generation. The principleis universal — limits, then length, then tension. The specific figures below are Shimano’s, for those three models, and we’re not going to pretend they’re anyone else’s.
What you need
Shimano’s manual lists the tools for this job: a 2 mm, 3 mm, 4 mm and 5 mm hexagon wrench, a #2 screwdriver, and a Hexalobular #10. In practice, for an adjustment rather than an install, you will use the screwdriver and your fingers, and a 5 mm hex only if you disturb the cable. A repair stand makes it far easier because you need to turn the cranks while watching the cassette; a bike upside down on the floor works and is how most of us learned.
Shimano publishes torque figures, and they are worth knowing before you undo anything: the rear derailleur fixing bolt is 8–10 N·m, the cable fixing bolt is 6–7 N·m, the pulley bolts are 2.5–5 N·m, and the plate stopper pin and stopper bolt are 1 N·m. One newton-meter is very little — that is a figure worth respecting rather than guessing at, and it is the reason a torque wrench is a genuinely useful thing to own.
Step 1 — the top limit screw
Shift the chain to the smallest sprocket. The top limit screw — Shimano calls it the top adjustment screw— controls how far outboard the derailleur can travel.
Shimano’s instruction is precise and better than the usual advice: turn the top adjustment screw to position the guide pulley over the outer line of the smallest sprocket, seen from the rear. Not centerd on it — the outer line of it. Get behind the bike and sight down the chain. The guide pulley is the upper of the two jockey wheels.
This is what stops the chain throwing itself off into the dropout. If you have ever had a chain jam between the smallest sprocket and the frame, this screw is why.
Step 2 — the low limit screw
Shift to the largest sprocket. Shimano: turn the low adjustment screw to position the guide pulley directly underneath the largest sprocket.
Directly underneath — that is the whole spec. This one matters more than its counterpart, because the failure mode is worse: too far inboard and the chain goes over the top of the cassette and into the spokes, which can end your ride and your wheel at once. Stephen’s rule, learned the expensive way, is to set this one conservatively and check it every time the wheel comes out of the frame.
Note that both limit screws are checked with the chain already at that end of the cassette, and neither of them affects shifting quality anywhere in the middle. If your bike shifts badly between sprockets 4 and 8, these two screws are not your problem and turning them will make things worse.
Step 3 — chain length (only if the chain is new)
Skip this if you’re adjusting an existing setup. If the chain is new, Shimano’s method is the one to use, and it’s a measurement you take on your bike rather than a number anyone can publish for you:
Mount the chain onto the largest sprocket and the largest chainring, then add 1–3 links to set the length. Shimano then splits the case: if the inner links and outer links meet, set the length with 2 links added. If the inner links match together and the outer links match together, set it with 1 or 3 links added— and it adds that if you’re concerned about drive wandering at the 1-link setting, use 2 more than that.
The manual also carries a warning worth repeating: the derailleur plate has a pin or plate that prevents chain derailment, and the chain must be passed through the derailleur body from that side. Thread it the wrong way and you can damage the chain or the derailleur. If you are cutting a chain to length, our chains roundup covers which link counts the listings publish and why 126 is the safer error.
Step 4 — B-tension, which Shimano doesn't call B-tension
Here is a small thing that trips people up when they go looking in the official documentation: Shimano’s manual calls it the “end adjust bolt”. The whole internet calls it the B-tension screw or the B-screw. Same bolt. It sets how far the derailleur body hangs back from the cassette, which sets the gap between the guide pulley and the sprocket teeth.
Shimano’s procedure:
Mount the chain on the largest sprocket and turn the crank arm backward. Turn the end adjust bolt to move the guide pulley as close to the sprocket as possible but not so close that the chain gets jammed. Then check that the chain does not jam when it is on the smallest sprocket. And if there is any slack in the chain with the chain on the smallest chainring and smallest sprocket, adjust the end adjust bolt to eliminate it.
Notice what Shimano does not do here: it does not give you a millimeter figure for the gap. Plenty of guides will confidently tell you 5 mm or 6 mm. That number is not in this manual for these derailleurs, so we’re not going to print it. Shimano’s spec is behavioral — as close as possible without jamming, checked at both ends of the cassette. Turning the cranks backward is the part people skip, and it’s the part that reveals the jam.
Step 5 — cable tension, which is the one you actually needed
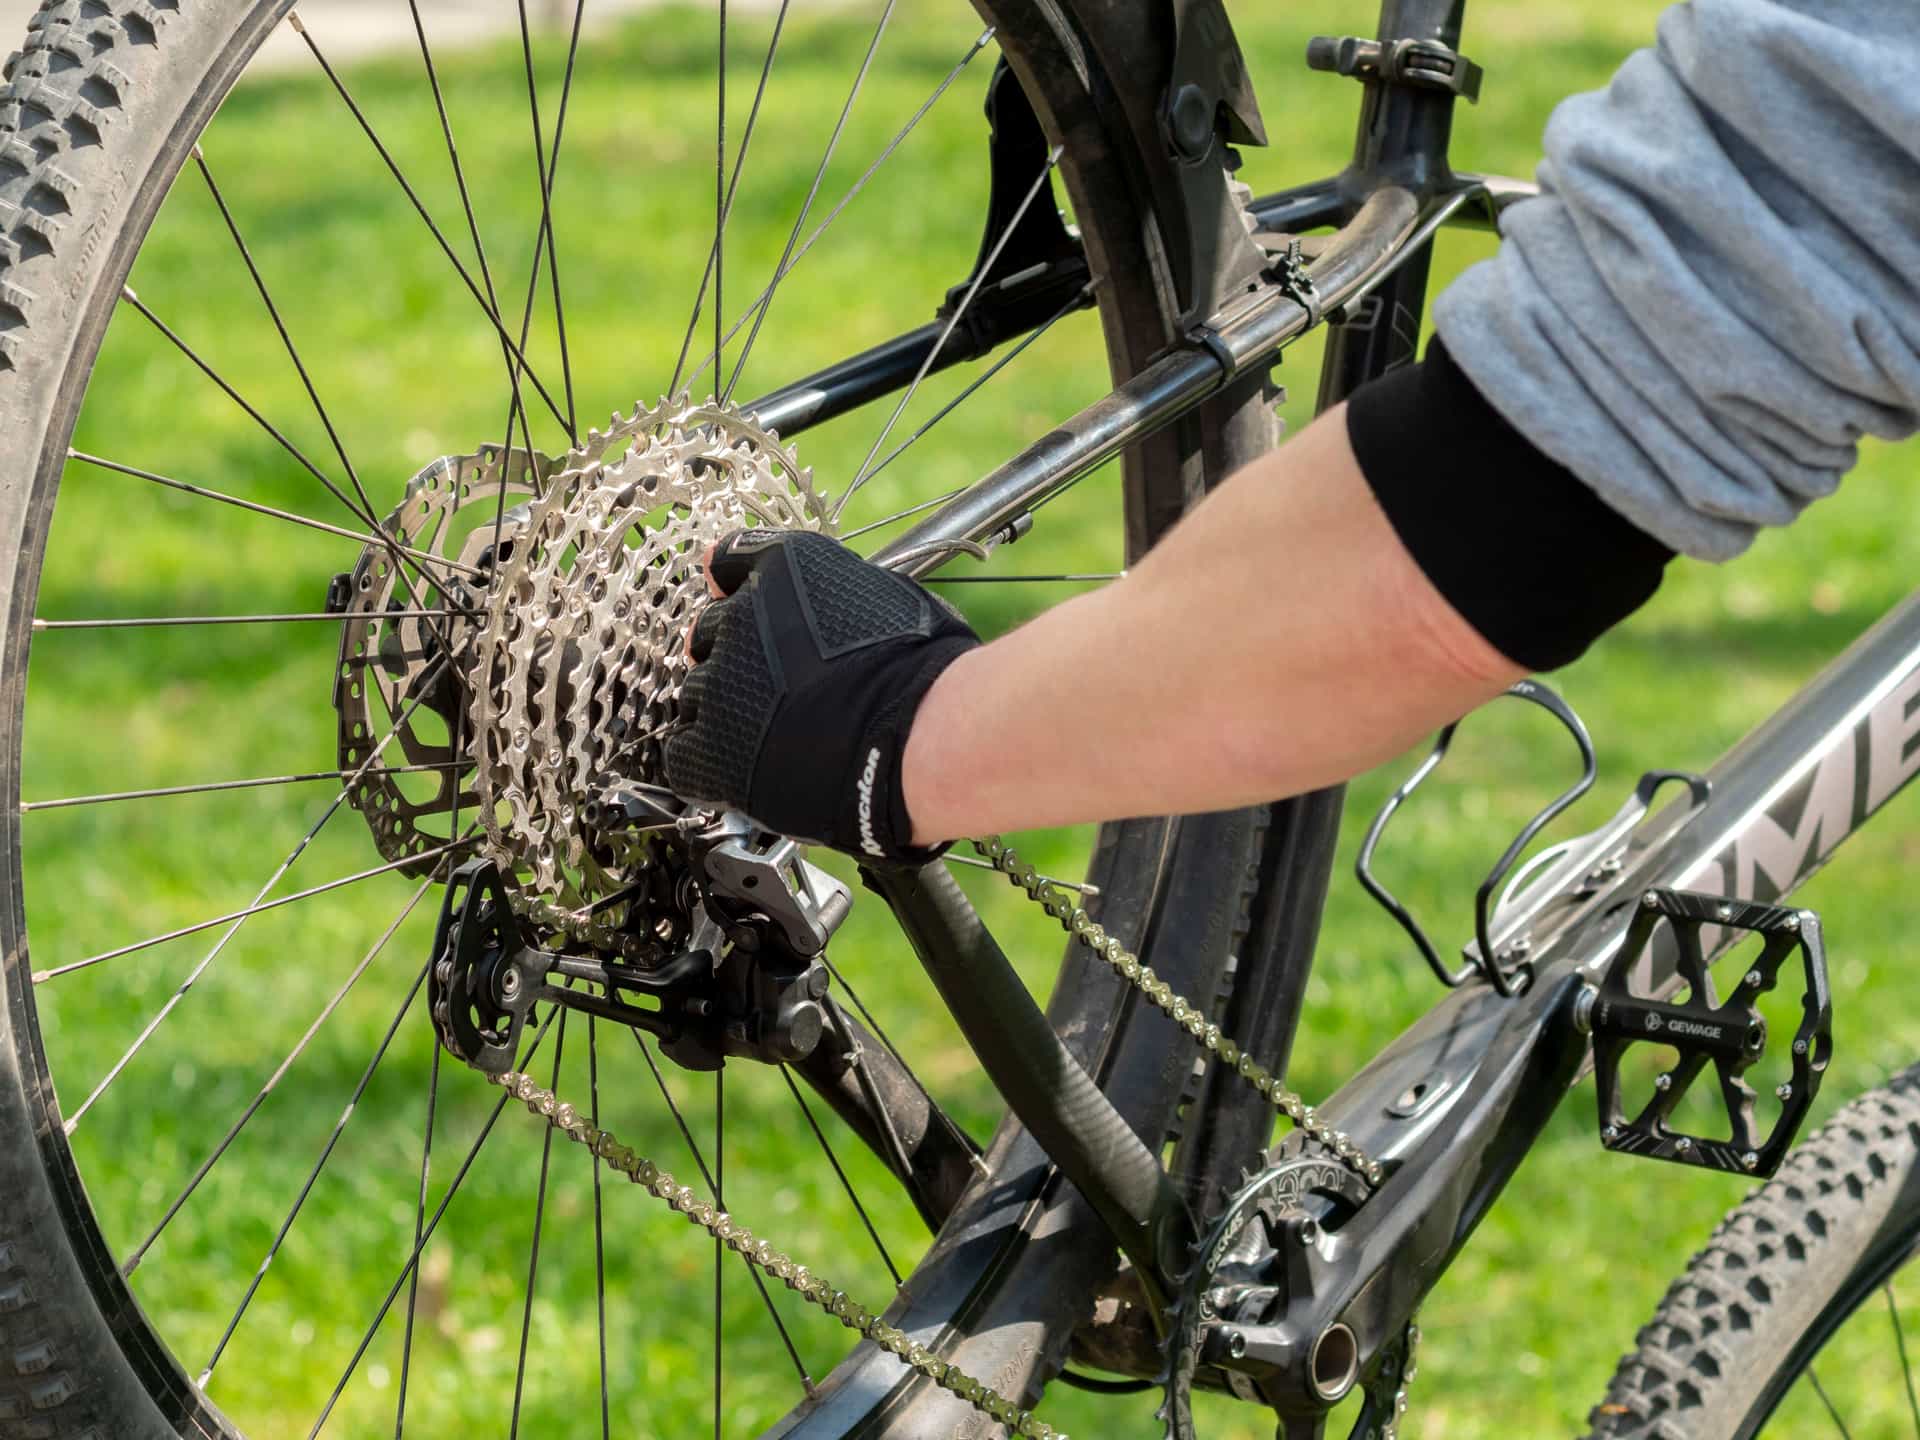
This is the step that fixes bad shifting, and Shimano gives it a genuinely clever test that almost nobody outside a workshop seems to know. Shimano calls the whole thing SIS adjustment. It happens at the barrel adjuster — the knurled barrel where the cable enters the derailleur — and it needs no tools at all.
The reference point.Shimano: “the best setting is when the shifting lever is operated just enough to close the lever gap and the chain touches the 3rd sprocket counting from the smallest sprocket and makes noise.”
Read that twice, because it is doing something subtle. You are not shifting to the 3rd sprocket. You are asking for a shift with a partial lever movement and listening for the chain to brush the 3rd sprocket. The noise is the measurement. Correct tension is defined as the exact point where the chain is just close enough to rattle.
Then, from Shimano, the two corrections:
If the chain shifts all the way to the 3rd sprocket— tension is too high. Tighten the cable adjustment barrel clockwise until the chain returns to the 2nd sprocket counting from the smallest.
If no sound at all is generated— tension is too low. Loosen the cable adjustment barrel counter-clockwise until the chain touches the 3rd sprocket and makes noise.
Then the finishing move: with the chain touching the 3rd sprocket and making noise, turn the barrel clockwise slightly until the noise stops and the chain runs smoothly. That is the setting. Ride it.
Stephen’s honest note on this step: it is counter-intuitive that you deliberately create a noise and then dial it out, and it feels wrong the first few times. It is also the single most useful thing he has learned about drivetrains, because it turns a vague complaint (“it’s hesitating”) into a repeatable test with a defined pass condition. A quarter-turn is a lot. If you’re turning whole revolutions, something else is wrong.
If the cable is off, or you're starting from scratch
Shimano’s cable spec, from the same manual: loosen the end adjust bolt first, check there is enough slack in the outer casing, and align the casing with the bottom edge of the outer casing holder on the derailleur before cutting off the excess. When cutting outer casing, cut the end opposite the end with the marking, and make the cut end round so the hole has a uniform diameter.
Connect the inner cable, remove the initial slack, reconnect it, and make sure the cable sits securely in the groove — then the fixing bolt at 6–7 N·m. Leave approximately 30 mm or lessof inner cable margin and fit the inner end cap. Shimano adds a note that is easy to ignore and shouldn’t be: check the cable doesn’t interfere with the wheel spokes, and stop the wheel turning while you do it.
When adjustment isn't the answer
Three honest failure cases, because a guide that promises everything is fixable by barrel adjuster is lying to you.
A bent hanger.If the derailleur visibly isn’t hanging parallel to the cassette, no amount of cable tension will fix it — you are adjusting a component that is pointing the wrong way. Shimano’s manual is specific that the projection on the rear of the bracket must contact the fork end tab with no gap, and that you should periodically check that, because a gap causes shifting problems. That is an install check, not a tension one.
A worn chain.A stretched chain shifts badly on any derailleur at any tension, and it is quietly reshaping your cassette while you fiddle with the barrel. Check it before you adjust anything — when to replace a bike chain covers the thresholds.
A filthy drivetrain.Grit in the cable outers makes tension inconsistent, so your careful adjustment holds for a day and drifts. If the chain leaves black paste on your finger, clean it first — how to clean a bike chain— and adjust afterwards. In that order.
And if the derailleur simply won’t reach your biggest sprocket, that is a capacity limit, not an adjustment: Shimano publishes a maximum low sprocket for every model — 30T for the short-cage RD-R7000-SS and RD-R8000-SS, 34T for the GS versions. The cassette and chainring guide covers what happens when you exceed it.
Shimano’s published figures for this job
Every figure below is quoted from Shimano dealer’s manual DM-RARD001-04, which covers DURA-ACE RD-R9100, ULTEGRA RD-R8000 and 105 RD-R7000. Retrieved 17 July 2026. If your derailleur isn’t one of those three, find your own manual — these are not universal numbers and we’re not presenting them as such.
| Fastener / setting | Shimano’s figure | Note |
|---|---|---|
| Rear derailleur fixing bolt | 8–10 N·m | Set with no gap between the bracket projection and the fork end tab |
| Cable fixing bolt | 6–7 N·m | Cable must sit securely in the groove first |
| Pulley bolts | 2.5–5 N·m | 3 mm hex; check the arrow direction on the pulley |
| Plate stopper pin / stopper bolt | 1 N·m | Hexalobular #10 for the stopper bolt |
| Inner cable margin | ≈30 mm or less | Fit the inner end cap; check it clears the spokes |
| Chain length | +1 to +3 links | Measured on the largest sprocket AND largest chainring — not a fixed number |
| Guide pulley to sprocket gap | Not published | Shimano specifies behavior — as close as possible without jamming — not a distance |
| Top limit position | Not a number | Guide pulley over the OUTER LINE of the smallest sprocket, seen from the rear |
| Low limit position | Not a number | Guide pulley DIRECTLY UNDERNEATH the largest sprocket |
The row that matters most is the one that says not published. Guides across the web quote a specific millimeter gap for B-tension on these derailleurs. That figure is not in Shimano’s manual for these models, so wherever it came from, it didn’t come from Shimano.
What actually decides this purchase
The barrel adjuster is free and it is almost always the answer.Before you buy anything, do the 3rd-sprocket test above. A quarter-turn of a knurled barrel fixes more “my drivetrain is worn out” complaints than any component purchase, and it costs nothing but two minutes.
A chain checker is the highest-value tool in this job.Not because it adjusts anything, but because it tells you whether adjusting is pointless. A stretched chain shifts badly no matter how well you set the cable, and it’s destroying the cassette while you work. It is the cheapest tool on this list by a distance.
A torque wrench earns its place at 1 N·m.Shimano publishes 1 N·m for the plate stopper pin and stopper bolt. That is a genuinely small number and hands are terrible at it — the standard failure is over-tightening a small fastener into a light alloy part and stripping it. If you own one torque wrench, this is the range where it pays for itself.
You need less hex than you think for an adjustment.Shimano’s tool list for the whole install-and-adjust job runs 2, 3, 4 and 5 mm hex, a #2 screwdriver and a Hexalobular #10. For a tension adjustment you need your fingers. For limit screws you need the screwdriver. Everything else on that list is for jobs you probably aren’t doing today — and a decent multitoolcovers most of it if you’re not building a workshop.
A stand is a luxury that changes the job.You have to turn the cranks and watch the cassette at the same time. Upside down on the floor works — it is how most people learn — but it reverses everything you’re looking at and makes the “turn the crank backward” step in Shimano’s B-tension procedure genuinely awkward.
Common questions
Which way do I turn the barrel adjuster?
Shimano’s manual is explicit. Clockwise tightensthe cable adjustment barrel — use it when the chain is shifting too eagerly toward the bigger sprockets. Counter-clockwise loosensit — use it when the chain is sluggish going up the cassette. The test to aim at: ask for a shift with just enough lever movement to close the lever gap, and the chain should touch the 3rd sprocket from the smallest and make noise. Then tighten slightly clockwise until the noise stops.
What's the correct B-tension gap in millimeters?
Shimano doesn’t publish one for these derailleurs, and that surprises people because so many guides quote a figure. What Shimano’s dealer’s manual specifies for DURA-ACE RD-R9100, ULTEGRA RD-R8000 and 105 RD-R7000 is a behavior, not a distance: with the chain on the largest sprocket and the crank turning backward, move the guide pulley as close to the sprocket as possible without the chain jamming — then confirm it doesn’t jam on the smallest sprocket either. If you have seen a specific millimeter number for these models, it did not come from this manual.
My chain jumps into the spokes. What do I fix?
The low limit screw, and do it before you ride again — this is the failure mode that destroys wheels. Shimano’s spec is to turn the low adjustment screw so the guide pulley sits directly underneath the largest sprocket. If it’s traveling further inboard than that, the chain has somewhere to go and eventually it goes there. Also check the derailleur hanger is straight: if the derailleur isn’t hanging parallel to the cassette, you’re adjusting a component that’s aimed wrong, and the limit screw is patching a symptom.
Do I adjust the limit screws or the cable first?
Limit screws first, cable tension last — that is the order in Shimano’s manual (stroke adjustment, then chain, then cable, then end adjust bolt, then SIS adjustment) and the reason is that the limits define the two ends of the travel that everything else works within. The practical version: if your bike currently shifts across the whole cassette without throwing the chain off either end, your limits are already fine and you should not touch them. Go straight to the barrel adjuster.
Does this work for SRAM or electronic derailleurs?
The principle carries — limits, then length, then tension — but the specifics here don’t. Every figure on this page is from one Shimano manual covering three Shimano mechanical road derailleurs. SRAM’s procedures and torque figures are SRAM’s to publish, and electronic groupsets replace cable tension with a microadjustment done at the shifter or in an app, so the barrel-adjuster step doesn’t exist in the same form. Find the manual for the derailleur you actually own. That is the real advice in this answer.
Sources
- Shimano — Dealer's Manual DM-RARD001-04, Rear Derailleur (DURA-ACE RD-R9100, ULTEGRA RD-R8000, 105 RD-R7000): stroke adjustment, chain length, securing the cable, end adjust bolt, SIS adjustment, tightening torques and tool list — retrieved 2026-07-17
- Shimano — road rear derailleur specifications (maximum low sprocket and total capacity by model) — retrieved 2026-07-17
- Shimano — technical documents index (where the dealer's manuals are published) — retrieved 2026-07-17
Read next
- When to replace a bike chain
Check this before you adjust anything.
- How to clean a bike chain
Grit in the cables makes tension drift.
- Cassette and chainring guide
When it's a capacity limit, not an adjustment.
- The best bike multitool
The hex sizes Shimano's manual asks for.
- The best home workshop tools
The torque wrench this job wants, and the range it stops at.
We haven’t ridden or tested any of the products on this page, and we don’t pretend otherwise. Read how we research — or tell us we’re wrong and we’ll log the correction.