How to set up tubeless tires
The part everyone remembers is the bead that won't seat — and a floor pump often can't do it. Here's the whole job, compatibility to sealant, and the mechanism behind the step that defeats people.
Heads up: we earn a commission if you buy through the links on this page, at no extra cost to you. It never decides what makes the list — here’s how that works.
Everyone who has set up a tubeless tire has a story about the moment it wouldn’t seat — the pump going nowhere, air hissing out as fast as it goes in, sealant on the floor, and a quiet reconsideration of the whole idea. That moment is the actual skill in this job, and it has almost nothing to do with the sealant. It is about getting a burst of air into the tire fast enough to snap the bead into place before the air escapes past it. Understand that one thing and the rest is housekeeping.
The procedure below is Park Tool’s published tubeless method, quoted where it matters, with the common failure modes and the honest note about the mess added around it. Nothing here was bench-tested by us; it is a mechanical procedure explained from published sources, not a product review. If you’re still deciding whether tubeless is worth the faff at all, read tubeless vs tubesfirst — it covers the decision and the running costs before you commit to the setup. This page assumes you’ve made that call.
First: are your tire and rim actually tubeless-ready?
Park Tool’s opening instruction is the one people skip: “verify that your components are tubeless compatible.”This is not a formality. A rim and tire that were never designed to be airtight can sometimes be bullied into holding air with enough sealant — and can also blow off at the worst possible moment. Do the boring check first.
There are two flavors of “tubeless” you’ll see on tires. USTtires have a sealed, airtight carcass and a stiff, tightly-toleranced bead — in principle they hold air with little or no sealant. Tubeless-ready(often marked “TLR”) tires have a lighter, more porous casing that relies on sealant to become airtight. Almost every modern gravel and road tubeless tire is the tubeless-ready kind, which is exactly why sealant is not optional on them. A tire with no tubeless marking at all is a tube-type tire, and it is the one you should not try to convert. For which gravel tires actually ship tubeless-ready in the first place, see our gravel tire guide.
The rim matters just as much, and here there is a hard number you cannot argue with. Many current gravel and road rims are hookless— the rim wall has no small hooked lip to catch the tire bead, so the bead is held purely by shape and pressure. ENVE, documenting the ETRTO/ISO standard, gives the ceiling plainly: the maximum pressure for a hookless setup is 5 bar (72.5 psi), and a tire only earns an “approved” listing on their chart if it can hold 165% of that — 120 psi — without blowing off the rim. Read it the right way round: 72.5 psi is not a target, it’s a ceiling,and it applies even if the tire’s own sidewall says it will take more. If you run hookless, that number is the law of your bike, and it is another reason to start from a tire the rim maker actually approves.
The unglamorous half: rim tape and the valve
Before the tire goes anywhere near the rim, the rim itself has to be made airtight — and this is where most “mystery” leaks are actually born. A tubeless rim needs tubeless-specific rim tape covering every spoke hole in the rim bed, pulled tight and stuck down cleanly, with no wrinkles and no bubbles. One good wrap is usually enough if the tape is the right width for the channel: too narrow and it leaves the edge of a spoke hole exposed, too wide and it rides up the sidewall and stops the bead seating. Then you pierce one small hole for the valve.
The valve pushes through that hole from inside the rim, its rubber cone sealing against the rim bed, and the lock ring snugs it down from outside. Park Tool’s reminder is worth taking literally: “check that the valve is secure in the rim.”A tubeless tire that quietly loses a few psi overnight is, more often than anyone likes to admit, not a leaky tire at all — it’s a valve that isn’t quite tight, or a single spoke hole the tape didn’t seal. Fix the boring things before you blame the tire.
The unglamorous half, as parts
Tape and a valve are the cheapest things in this whole job and the two most likely to be the reason it leaks. Nothing here is ranked — check the stated width against your own rim before you buy, because that is the fitment decision the section above is about.
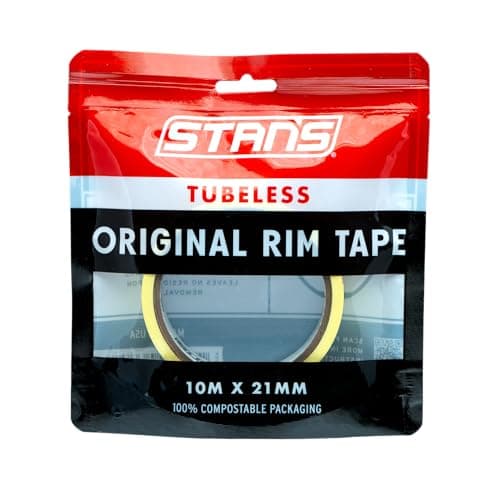
Stan's NoTubes Rim Tape
Tubeless-specific rim tape. This listing states 21mm — match the width to your rim channel, not to what came off it.
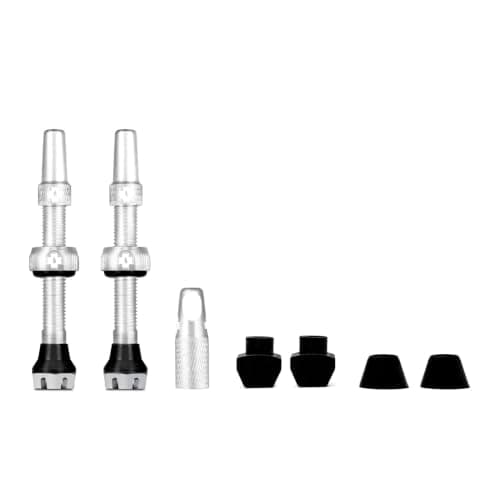
Muc-Off Tubeless Presta Valves
Presta, 44mm, and the listing states a core-removal tool is included — which the injection method further down needs.
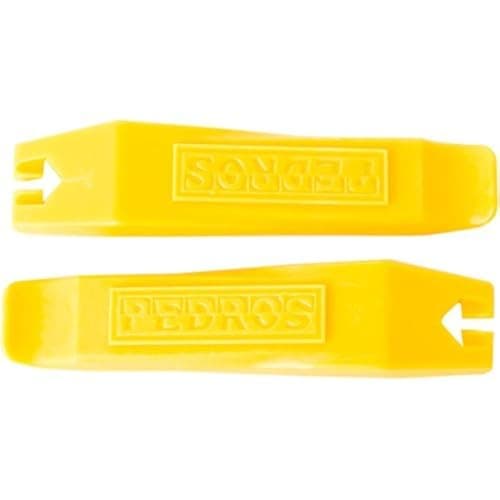
Pedro's Tire Levers
Thumbs first, always. If the bead genuinely will not go, a smooth plastic lever is what you want near a fresh tubeless bead.
$8.50 · View on Amazon$9.99 −15%
We haven’t tested any of these — they’re the parts the job above calls for, listed so you don’t have to go hunting. Prices are live from Amazon and we earn a commission if you buy. Prices as of October 18, 2026. #ad
Mounting the tire
Now the tire. Park Tool: “Install one bead on the rim. Install the second bead beginning at the valve. Leave a portion of the bead uninstalled.” That last part only applies if you plan to pour sealant in over the bead — more on the two methods below. As you work, push the bead down into the deep center channel of the rim; that’s where the slack is, and it’s the difference between finishing the last hard section with your thumbs and reaching for a lever that can nick the fresh bead. If the tire is genuinely tight, Park Tool’s advice is the same as for any stubborn tire: “if it’s a tight bead, it can help to use soapy water and lubricate the bead.”Soapy water is the single most useful thing on the bench for tubeless — it helps the tire go on, and, crucially, it helps the bead slide up and snap into place when you inflate.
The seating problem — why a floor pump sometimes won’t do it
This is the step that defeats people, so it’s worth understanding the mechanism instead of just buying a bigger pump. To seat, the tire bead has to jump outward and lock into the rim’s bead shelf, and it has to do that beforethe air you’re adding leaks back out through the gap between the unseated bead and the rim. It is a race between how fast you can put air in and how fast it escapes.
A floor pump adds air in measured strokes. On a tire with a tight, well-matched bead that’s often enough — you pump hard, the bead pops around the rim with a series of bangs, done. On a looser tire, or a wide gravel tire with a lot of internal volume, each stroke’s worth of air escapes past the bead before the next stroke arrives, and the tire never builds the pressure it needs to seat. You can pump until you’re exhausted and get nowhere. That is not a fitness problem. It’s an airflow-rate problem.
Two things fix it. First, remove the valve core— Park Tool has you do this for the injection method anyway (“remove the core using a valve core remover such as the Park Tool VC-1”) — because the core is a restriction, and taking it out lets air flood in far faster. Second, deliver that air in a burst rather than a trickle. That is exactly what a tubeless booster or “charger” pump does: you pump it up like a spare tank, then dump its whole stored volume into the tire at once. A shop air compressor does the same thing continuously, which is why Park Tool’s injection method simply says to “inflate the tire fully with an air compressor, allowing the bead to fully seat”— the compressor is doing the work a floor pump can’t. Whichever tool you use, Park Tool’s target is the same: “inflate the tire to at least the maximum pressure on the label”to pop both beads fully home — while respecting a hookless rim’s 72.5 psi ceiling if that’s what you’re on.
Adding the sealant — through the valve, or over the bead
There are two honest ways to get sealant in, and Park Tool documents both.
Over the bead (the pour method).You leave a section of the second bead unmounted, pour the sealant straight into the open tire, then — Park Tool — “slowly rotate the wheel to keep the fluid at the bottom while your unmounted bead comes to the top” and finish installing the bead. It’s simple and you can see exactly how much went in. The downside is that you then have to seat a tire already sloshing with liquid, which is messier — every failed seating attempt sprays sealant.
Through the valve (the injection method). You “mount both tire beads to the rim before adding any sealant,” seat the tire dry with the compressor, then remove the valve core and inject the sealant through the valve with a syringe. The advantage is real: you seat the bead clean and dry, with nothing to spray everywhere, and only then add the fluid. This is the method most people settle on the first time they mop a floor.
How much? Follow the tire’s or the sealant’s label — Park Tool just says to “check the label for the recommended amount of tire sealant.”Stan’s NoTubes publishes a volume chart, and for the gravel and road sizes this site covers it lands around 50 – 80 ml per tire (the table below has the exact figures). Worth knowing before you buy the bottle: sealant makers publish wildly different doses for the same tire, and one of the popular ones cannot be injected through a valve at all. Once it’s in, distribute it: reinstall the core, bring the tire back to pressure, and — Park Tool — “spin the wheel to move sealant around inside the tire.” Then bounce it, lay it flat on each side for a minute, and spin again. The goal is to wet the entire inner surface, especially the bead seat, where most slow leaks live.
Troubleshooting: burps, weeps and the leak that won’t stop
The bead sits low or uneven.Sight along the tire’s molding line all the way round — it should sit an even distance above the rim, and where it dips, the bead hasn’t seated. Park Tool’s fix: “Check that the tire bead is correctly seated. In some cases, the bead will be too low. Deflate the tire, break the bead at the low point, and lubricate with soapy water. Reinflate.”
It “burps” — a spurt of air and sealant when you hit something.That’s the bead briefly unseating under a side load, usually because the pressure is too low for your weight or the bead never fully seated in the first place. Getting the bead properly home, and not running silly-low pressures for the load, fixes most of it. Where the running-pressure trade-offs land is its own subject — our tubeless vs tubes piece has the honest version of the costs and benefits.
Sealant weeps through the sidewall.On a fresh tubeless-ready tire this is normal — the casing is porous by design and the sealant is doing exactly its job, filling the weave. Spin it, ride it gently, add a little more if it persists, and it settles. A sealed UST casing does this far less, which is part of what you pay for with UST.
It goes soft overnight but holds when you ride. Suspect the valve and the tape before the tire, as above. Pump it up, spray the valve base and the bead with soapy water, and watch for the bubbles that tell you where the air is going.
The leak sealant simply can’t win.Be honest about the limits: sealant plugs small holes, not slashes, and Park Tool’s published position is blunt — “in general, punctures in tubeless tires cannot be repaired,” with vulcanizing patches viable only on UST and butyl-lined tires. So the tube in your saddlebag is not optional just because you went tubeless. When the sealant loses, the fix is the old one: pull the valve, fit a tube, ride home. Our guide to fixing a flatis exactly what to do when sealant doesn’t save you on the road.
What we haven’t done
We have not bench-tested pumps, sealants or rims. The procedure here is Park Tool’s, quoted and linked; the sealant volumes are Stan’s own published chart; the hookless pressure ceiling is the ETRTO/ISO figure ENVE documents. Everything else is mechanism — where the air goes, where it leaks, and why a burst of air seats a bead that a trickle can’t — which you can verify by doing it yourself. Messily, the first time. Everyone does.
How much sealant, per Stan’s own chart
These are Stan’s NoTubes’ published starting points for the road and gravel sizes this site cares about — mountain-bike tires need far more. Treat them as a floor, not a rule: Stan’s is explicit that “tire casings vary widely between manufacturers, some tires may require more tubeless sealant.” A thin, porous gravel casing genuinely drinks more than a thick one.
| Tire size | Stan’s recommended amount |
|---|---|
| 700c x 28 mm (road) | 50 ml (1.7 oz) |
| 700c x 32 mm (all-road) | 55 ml (1.8 oz) |
| 700c x 40 mm (gravel) | 60 ml (2 oz) |
| 650b x 47 mm (gravel) | 80 ml (2.7 oz) |
Figures are Stan’s NoTubes’ own published volume chart, read 8 August 2026. The right number is whatever seals your specific tire and holds it — if a fresh setup keeps weeping, add more before you blame the tire. Sealant is also a consumable: it dries out over time and needs topping up, which is a running cost tubes don’t have.
What actually decides this purchase
The one thing that decides whether setup is easy: how fast you can deliver air.A floor pump seats an easy tire and defeats a hard one. A tubeless booster or charger pump — or a shop compressor — delivers the burst that seats a stubborn bead. If tubeless setup keeps beating you, this is almost always the missing tool, not a lack of effort.
Remove the valve core to seat.The core is a restriction. Taking it out, the way Park Tool’s injection method does, roughly doubles how fast air gets in — often the difference between a bead that pops and one that never builds pressure.
Buy the right tape and use soapy water.Correct-width tubeless tape, laid without wrinkles, prevents the slow leaks people blame on the tire. Soapy water helps the tire mount and helps the bead snap into place — it’s the cheapest thing on the bench and the most useful.
Respect the hookless ceiling.If your rims are hookless, 5 bar (72.5 psi) is the ETRTO/ISO maximum ENVE documents, and it overrides whatever the tire’s sidewall claims. Start from a tire the rim maker actually approves for hookless use; see the gravel tire guide for which tires ship tubeless-ready.
Treat sealant as a consumable, and still carry a tube.Sealant dries out and needs topping up — a running cost tubes don’t have — and it can’t fix a big cut. Park Tool is clear that tubeless punctures generally can’t be repaired, so a tube and pump remain your way home. Our flat-repair guide covers the fallback.
The dose guidance on this page is Stan’s, and that is not an accident: Stan’s versus Orange Sealrecords that Stan’s is the only one of the two brands publishing a dose per tire width at all.
Common questions
Can I set up tubeless with just a floor pump?
Sometimes — it depends entirely on how well the bead fits the rim. Seating is a race between how fast you add air and how fast it escapes past the unseated bead, so a tight, well-matched tire can seat off a good floor pump, while a looser or high-volume gravel tire won’t. The reliable fixes are to remove the valve core so air flows in faster, lubricate the bead with soapy water, and deliver the air in a burst from a tubeless charger pump or a compressor rather than in strokes. Park Tool’s own injection method uses a compressor for exactly this reason.
How much sealant does a gravel or road tire need?
Stan’s NoTubes’ published chart puts a 700c x 28 mm road tire at about 50 ml (1.7 oz), a 700c x 40 mm gravel tire at about 60 ml (2 oz), and a 650b x 47 mm gravel tire at about 80 ml (2.7 oz). Those are starting points, not laws — Stan’s notes that casings vary between manufacturers and some tires need more. If a fresh setup keeps weeping through the sidewall, add a little more before you conclude the tire is faulty. Remember sealant dries out and needs periodic topping up.
Can I make a regular (non-tubeless) tire tubeless?
You shouldn’t. Park Tool’s first step is to verify your components are tubeless compatible for a reason. A tube-type tire has no tubeless bead and no sealed casing; with enough sealant it can sometimes be forced to hold air, but its bead isn’t designed to lock to the rim under pressure and it can blow off. Use a tire marked tubeless-ready (TLR) or UST on a tubeless-compatible rim. See our gravel tire guide for tires that ship tubeless-ready.
What is the maximum pressure on a hookless rim?
For hookless road and gravel rims, ENVE documents the ETRTO/ISO ceiling as 5 bar (72.5 psi), and requires an approved tire to hold 165% of that — 120 psi — without blowing off. Crucially, that 72.5 psi ceiling applies even if the tire’s sidewall is rated higher: on a hookless rim the standard, not the tire, sets your limit. Hooked rims don’t share this ceiling, but you should still never exceed the lower of the tire’s and the rim’s stated maximums.
Why does my tubeless tire lose air overnight?
Usually it isn’t the tire. The two most common culprits are a valve that isn’t quite tight in the rim — Park Tool tells you specifically to check the valve is secure — and rim tape that didn’t fully seal a spoke hole. Pump the tire up, spray the valve base and the bead with soapy water, and watch for bubbles. A fresh tubeless-ready casing also weeps a little through the sidewall until the sealant fills the weave, which is normal and settles with a few rides.
Do I still need to carry a tube and pump if I run tubeless?
Yes. Sealant seals small holes, but Park Tool’s published position is that punctures in tubeless tires generally cannot be repaired — so once a cut is beyond what the sealant can plug, the only way home is fitting a tube. Tubeless hugely reduces how often you’ll need it; it does not let you leave it at home. Our flat-repair guidecovers fitting a tube when sealant can’t save you.
Sources
- Park Tool — Tubeless Tire Mounting and Repair (verify components are tubeless compatible; install one bead then the second beginning at the valve; "if it's a tight bead ... use soapy water"; pour vs injection methods; remove the valve core with a VC-1; "inflate the tire fully with an air compressor, allowing the bead to fully seat"; "inflate the tire to at least the maximum pressure on the label"; break a low bead and reinflate; "spin the wheel to move sealant around"; "in general, punctures in tubeless tires cannot be repaired") — retrieved 2026-08-08
- Stan's NoTubes — How Much Sealant Should I Add To My Tires? (published volume chart: 700c x 28 mm ~50 ml/1.7 oz, 700c x 32 mm ~55 ml/1.8 oz, 700c x 40 mm ~60 ml/2 oz, 650b x 47 mm ~80 ml/2.7 oz; "tire casings vary widely between manufacturers, some tires may require more tubeless sealant") — retrieved 2026-08-08
- ENVE — Hookless Rim Technology 101 (ETRTO/ISO maximum pressure for a hookless setup of 5 bar / 72.5 psi; a tire must hold 165% — 120 psi — to be listed Approved/Recommended) — retrieved 2026-08-08
Read next
- Tubeless vs tubes
The decision — and the running costs — before you set it up.
- The best tubeless sealant
Which bottle to buy, and the published dose for your exact tire width.
- The best gravel bike tires
Which tires are tubeless-ready in the first place.
- How to fix a flat
What to do when sealant doesn't save you on the road.
- Stan's vs Orange Seal
Why the dose guidance here is Stan's and not the other brand's.
We haven’t ridden or tested any of the products on this page, and we don’t pretend otherwise. Read how we research — or tell us we’re wrong and we’ll log the correction.