Bike Bolt Torque Guide
Every figure here is a manufacturer's published number, attributed to the brand that published it. None of them outranks the spec printed on your own component.
Heads up: we earn a commission if you buy through the links on this page, at no extra cost to you. It never decides what makes the list — here’s how that works.
Torque is not tightness — it is a measurement of the twisting force you applied to get there.What actually holds a component in place is the clamping load (“preload”) in the stretched bolt, and torque is the only practical proxy a home mechanic has for it. Too little and the part slips, creaks, or fatigues the bolt through repeated micro-movement. Too much and you strip the thread, deform the component, or crack a carbon part that was perfectly fine ten seconds earlier.
The figures below are all published by the people who make the parts. We have not derived, averaged or estimated a single one, and Park Tool’s own caveat on its reference table applies to this page too: “Numbers provided for reference only. Note that some companies do not specify torque for certain components or parts. Contact the manufacturer for the most up to date specifications.”
The rule that outranks every table
If a figure is printed on your component, that figure wins.Modern stems, seatpost clamps and carbon bars usually have the spec laser-etched next to the bolt, and component manufacturers publish per-model figures in their dealer manuals — Shimano specifies 5–7 N·m for a front derailleur clamp bolt in its own dealer’s manual, for instance. A generic table is what you use when nothing is printed and no manual exists, not what you use instead of reading the part.
The second rule, from the frame side: Cannondale’s owner’s manual warns that a carbon seatpost can be damaged by clamping force and to use the minimum force necessary. On carbon, the published maximum is a ceiling to approach carefully — not a target to hit.
The four failures torque prevents
- The slipping seatpost.Under-tightened, and every bump drops it a millimeter. The fix is usually not more torque — it is carbon assembly paste and the published figure.
- The creaking bike. Creaks are micro-movement between two surfaces. Bolts at the wrong preload are the most common source, and the noise migrates so convincingly that people replace bottom brackets to fix a stem bolt.
- The stripped thread. Aluminum threads in a steel-bolted world are the soft party. Once stripped, the fix is a helicoil or a new component.
- The cracked carbon.Point loading from an over-tightened clamp is the classic way a carbon bar, post or steerer fails — often days later, under load.
The tools these figures need
Not a ranking — three tools that cover different parts of the range below. Read the ranges: the front of the bike lives between 4 and 20 N·m, and nothing here reaches a cassette lockring.
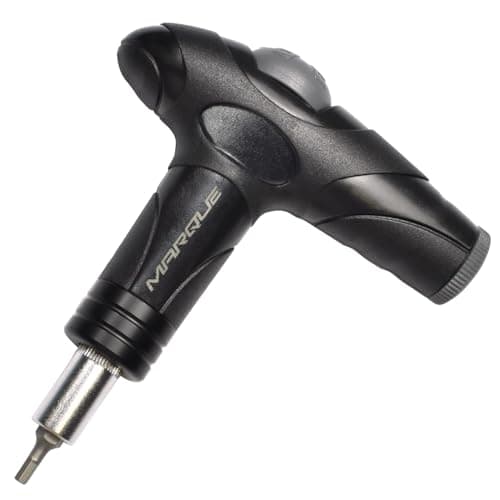
MARQUE Adjustable Bike Torque Wrench
A dial driver set to 4, 5 or 6 N·m with 3/4/5 mm hex and T25 bits per the listing — the exact band stem and seatpost bolts live in. The listing publishes no accuracy tolerance.
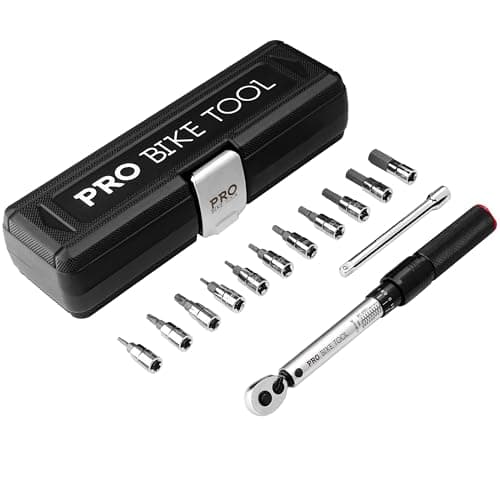
PRO BIKE TOOL Torque Wrench Set
The listing states a 2.2–16.9 N·m click range with hex and Torx bits, which covers the stem, seatpost and derailleur bolts but stops short of the 20 N·m top of the range below.
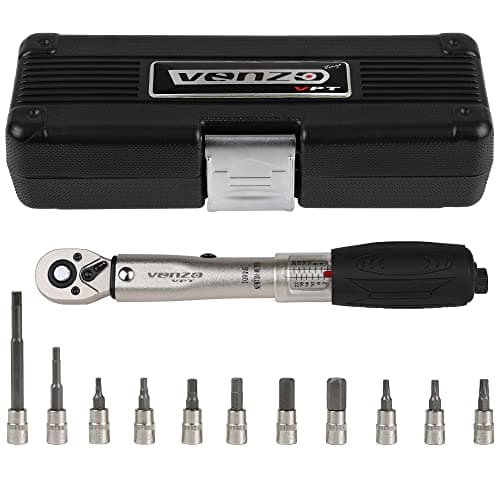
Venzo Bicycle Torque Wrench Set
The widest range here at a listed 2–22 N·m — still short of a cassette lockring, which Park Tool's table puts at 29.4–49 N·m for Shimano.
We haven’t tested any of these — they’re the parts the job above calls for, listed so you don’t have to go hunting. Prices are live from Amazon and we earn a commission if you buy. Prices as of October 18, 2026. #ad
Technique: the part nobody reads
A torque wrench is only as good as how it is used, and Park Tool publishes the rules in its torque wrench use and care guide:
- Wind click wrenches down after use.Park Tool: click-type wrenches “should be wound down to the lowest value on the scale (not zero) when not in use”. Storing a wrench at 20 N·m leaves its spring compressed and its calibration drifting.
- Do not loosen bolts with it.“It is not advisable to use click-type torque wrenches as common ratchet handles to remove fasteners or components.” Use a normal wrench to undo, the torque wrench only to do up.
- Recalibrate.Park Tool suggests every 5000 clicks, or at least once a year for a wrench in frequent use. A home wrench used a few times a month will not hit 5000 clicks in years — but it will still age.
- A damaged thread cannot be torqued.“A cross-threaded bolt will not properly tighten even with a torque wrench.” If it feels wrong going in, stop; the click you eventually get will be friction, not preload.
- Approach slowly and stop at the click.One smooth pull, not a series of jerks, and nothing after the click — a second pull adds torque the tool no longer measures.
The range problem: what home wrenches do not reach
Look at the table below and note where the big numbers are. Stem, seatpost, derailleur and caliper bolts sit between about 4 and 12 N·m — comfortably inside every tool in this guide. Then the drivetrain: Park Tool’s reference table lists a Shimano cassette lockring at 29.4–49 N·m, SRAM at 40, crank bolts at 34–44 N·m (Shimano) and pedals into cranks at 35 N·m minimum (Shimano) or 40 (Campagnolo).
None of the three tools above reaches those figures. That is not a criticism of them — it is the structure of the category, and it is the same ceiling our home workshop tools roundupdocuments in detail. If your job list is mostly cassettes and bottom brackets, you need a bigger, separate wrench, and no amount of care with a 20 N·m tool substitutes for it.
Where torque figures come from, and why brands differ
Notice in the table that two brands rarely agree. Shimano publishes 19.6–29.4 N·m for a stem handlebar binder; Control Tech publishes 13.6–16.3. Deda publishes 8 N·m for a threadless stem steerer bolt; Thomson 5.4; Race Face 6.2. These are not different opinions about the same bolt — they are different bolts, in different materials, with different thread pitches and clamp geometries.
That is the whole reason the “printed on the part wins” rule exists. A table is a starting point when you have nothing else; the component maker’s number is the answer.
What we could not tell you
We have not verified any manufacturer’s torque figure with a calibrated transducer, and no publisher without a test lab has. What this page does is collect published figures, attribute each to the brand that published it, and reproduce the caveats those brands attach — including Park Tool’s own reminder that its table is reference only and that some companies do not publish figures at all.
Published torque figures, by component and brand
Every figure is quoted from Park Tool’s published reference table or the component maker’s own dealer manual, read 18 August 2026. Where two brands publish different numbers for the same component, both are shown — because they are genuinely different parts, not a disagreement to average away.
| Component | Published torque | Published by | Inside a 2–20 N·m wrench? |
|---|---|---|---|
| Stem handlebar binder | 19.6–29.4 N·m | Shimano | Partly |
| Stem handlebar binder | 13.6–16.3 N·m | Control Tech | Yes |
| Threadless stem steerer bolts | 8 N·m | Deda | Yes |
| Threadless stem steerer bolts | 8.8 N·m | FSA carbon | Yes |
| Threadless stem steerer bolts | 5.4 N·m | Thomson | Yes |
| Threadless stem steerer bolts | 6.2 N·m | Race Face | Yes |
| Seat post binder | 4–6.8 N·m | Campagnolo | Yes |
| Seat rail binder | 20–30 N·m | Shimano | No |
| Seat rail binder (two-bolt) | 16.3 N·m | Control Tech | Yes |
| Front derailleur clamp bolt | 5–7 N·m | Shimano dealer's manual | Yes |
| Derailleur mounting bolts | 8–10 N·m | Shimano / SRAM | Yes |
| Disc caliper body mount | 6–8 N·m | Shimano | Yes |
| Disc caliper body mount | 9–10.2 N·m | Avid | Yes |
| Disc rotor to hub (M5) | 2–4 N·m | Shimano | Yes |
| Disc rotor to hub (M5) | 6.2 N·m | Avid | Yes |
| Pedal into crank | 35 N·m minimum | Shimano | No |
| Pedal into crank | 40 N·m | Campagnolo | No |
| Crank bolts | 34–44 N·m | Shimano | No |
| Crank bolts | 32–38 N·m | Campagnolo | No |
| Cassette lockring | 29.4–49 N·m | Shimano | No |
| Cassette lockring | 40 N·m | SRAM | No |
Park Tool’s caveat, printed with its table and repeated here: “Numbers provided for reference only… Contact the manufacturer for the most up to date specifications.” Anything etched on your own component beats every row above.
Common questions
What torque should bike stem bolts be?
Check the stem — most print it next to the bolt. Where nothing is printed, published figures vary widely by brand: Park Tool’s reference table lists Shimano at 19.6–29.4 N·m for a handlebar binder and Control Tech at 13.6–16.3, while threadless steerer bolts run from 5.4 N·m (Thomson) to 8.8 (FSA carbon). Those are different bolts in different designs, which is exactly why the printed figure wins.
Do I really need a torque wrench for a bike?
If any part of your bike is carbon, effectively yes — the failure mode for over-tightening carbon is a crack, and it often shows up later under load. On an all-alloy bike it is still the cheapest insurance against stripped threads and creaks. A 4–6 N·m preset driver covers the stem and seatpost bolts that matter most.
Can one torque wrench do the whole bike?
No. The front of the bike lives around 4–12 N·m; cassette lockrings, cranks and pedals are published at 29.4–49 N·m. A 2–20 or 2–24 N·m wrench covers the first group entirely and reaches none of the second. Two tools, or one tool and a shop visit for the drivetrain.
How should I store a click-type torque wrench?
Wound down. Park Tool’s published guidance is to wind click-type wrenches “down to the lowest value on the scale (not zero) when not in use”, so the spring is not left compressed. Also avoid using it to loosen bolts, and expect calibration to drift — Park Tool suggests every 5000 clicks or annually for frequent use.
Should bike bolt threads be greased before torquing?
Follow the component manufacturer, because it changes the number: a lubricated thread reaches a higher clamping load at the same torque reading. Park Tool’s reference article does not give general greased-versus-dry guidance, and neither will we — the honest answer is that the spec belongs to whoever made the part. For carbon interfaces, assembly paste (not grease) is the usual published recommendation.
Sources
- Park Tool — Torque Specifications and Concepts (published reference figures quoted in the table: stem handlebar binder Shimano 19.6–29.4 N·m, Control Tech 13.6–16.3; threadless steerer binder Deda 8, FSA carbon 8.8, Thomson 5.4, Time Monolink 5, Race Face 6.2; seat post binder Campagnolo 4–6.8 with the note that seat posts "require only minimal tightening to not slip downward"; seat rail binder Shimano 20–30, Campagnolo 22, Control Tech two-bolt 16.3; pedal into crank Shimano 35 minimum, Campagnolo 40; disc caliper body mount Avid 9–10.2, Shimano 6–8; disc rotor M5 bolts Avid 6.2, Shimano 2–4; cassette lockring Shimano 29.4–49, SRAM 40; crank bolts Shimano 34–44, Campagnolo 32–38; derailleur mounting bolts Shimano and SRAM 8–10. Caveat as published: "Numbers provided for reference only… Contact the manufacturer for the most up to date specifications.") — retrieved 2026-08-18
- Park Tool — Torque Wrench Use and Care ("click-type torque wrenches should be wound down to the lowest value on the scale (not zero) when not in use"; "It is not advisable to use click-type torque wrenches as common ratchet handles to remove fasteners"; calibration "every 5000 clicks, or at least once a year for wrenches that see frequent use"; "A cross-threaded bolt will not properly tighten even with a torque wrench") — retrieved 2026-08-18
- Shimano — Dealer's Manual DM-RAFD001 (front derailleur clamp bolt tightening torque 5–7 N·m) — retrieved 2026-08-18
- Cannondale — Bicycle Owner's Manual (a carbon seat post can be damaged by clamping force; adjust to the minimum clamping force) — retrieved 2026-08-18
Read next
- The best home workshop tools
Which torque wrench to buy, and the 14 N·m ceiling in detail.
- How to adjust a front derailleur
One of the jobs with a published clamp torque you can crush a frame with.
- The best bike repair stands
Holding the bike still enough that the wrench is what moves.
- Disc brake pads: organic vs sintered
Rotor bolts are among the lowest published figures on the bike.
We haven’t ridden or tested any of the products on this page, and we don’t pretend otherwise. Read how we research — or tell us we’re wrong and we’ll log the correction.