How to Fix a Tubeless Flat
Four repairs in escalating order, and the discipline that makes them work: do not take the tire off until the cheaper fixes have failed.
Heads up: we earn a commission if you buy through the links on this page, at no extra cost to you. It never decides what makes the list — here’s how that works.
The rule that decides a tubeless roadside repair is this: do not break the bead until you have to. Every fix below is ordered by how much of the system it disturbs, and once the tire comes off the rim you have lost the sealant, the seal and the fifteen minutes it takes to get them back. Work up the ladder, not down it.
The other half of the discipline is knowing what each step can actually do. Sealant handles small holes. Plugs handle bigger ones. A boot handles a cut. A tube handles everything else and is why you still carry one.
Level 1 — Let the sealant work (and help it)
Most tubeless punctures are sealing before you notice them. If you feel pressure dropping and see a spray, the useful thing is to keep the wheel turning and rotate the hole to the bottom: sealant pools at the lowest point, so putting the puncture there and letting the wheel spin gets latex to the hole. Pressing a thumb over the hole for a few seconds while the tire is still at pressure often does the rest.
Then top up the pressure — a sealed hole at 15 psi will unseal at 45 — and ride gently for a minute before trusting it. If the sealant is old and has dried out, none of this works, which is the strongest practical argument for the top-up schedule in our tubeless setup guide— and for buying a sealant whose maker actually publishes a service interval, which the sealant roundup ranks them on.
Level 2 — Plug it
A plug (“bacon strip”, rope plug or DART) is inserted from the outside, with the tire still on the rim, and it fills the hole physically so the sealant can finish the job. This is the repair that keeps most tubeless riders from ever fitting a tube.
Stan’s publishes the useful limits for its own system. The DART is designed for punctures larger than 5 mm, and its treated fabric reacts chemically with latex-based sealant to form an airtight seal — with the important corollary that if the sealant in your tire has dried up, the DART cannot bond. Rope-style plugs work mechanically instead and do not care about the sealant chemistry, which is why plenty of riders carry both.
The technique, whichever plug you carry:
- Find the hole while it is still hissing. Once it stops, you will not find it.
- Leave the wheel on the bike if you can — you are working from the outside.
- Push the tool in firmly and at an angle following the direction the puncture went in, not straight at the casing.
- Withdraw the tool smoothly, leaving the plug in place. Do not twist a rope plug back out with the tool.
- Reinflate, spin the wheel to distribute sealant over the plug, and check it holds pressure for a minute before riding.
- Trim the excess flush only once it has held. Some riders leave it proud — it wears down on its own.
The tubeless repair kit
Not a ranking — this is the kit the ladder above assumes, and it fits in a saddle bag. The tube is the last item because it is the last resort, not because it is optional.
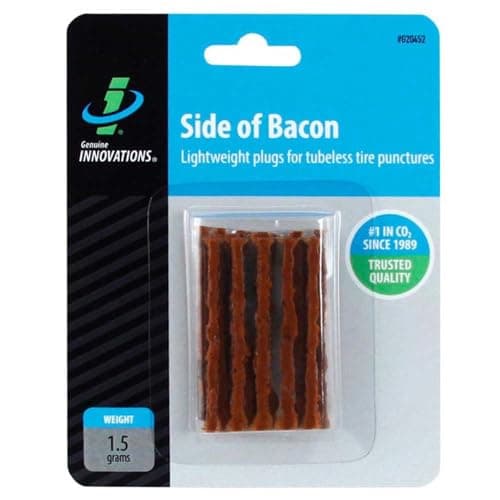
Genuine Innovations Tubeless Repair Kit
Rope plugs — the mechanical fix that works whatever your sealant is doing. The listing states 20 plugs, which is more roadside repairs than most riders will ever need.
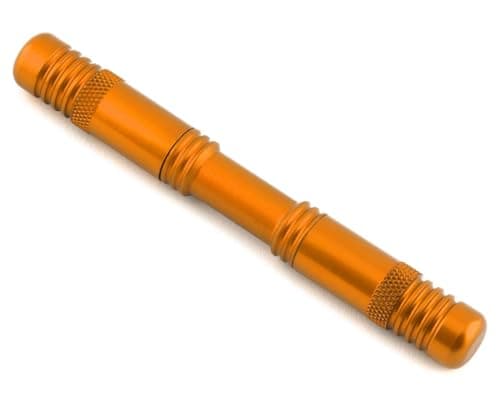
Dynaplug Racer
A pre-loaded plug tool you can operate one-handed without taking a glove off. Faster than threading a rope plug in cold weather.
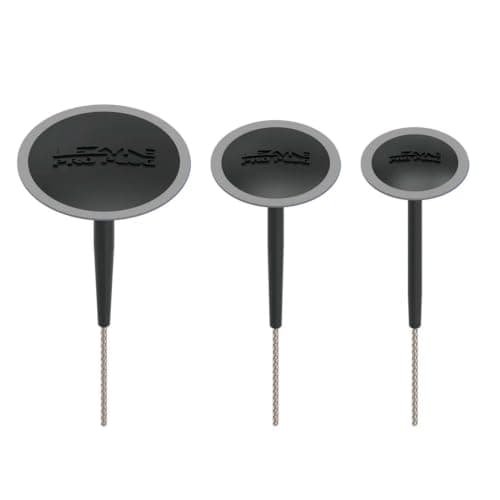
Lezyne Tubeless Repair Kit
The listing states three plug diameters — 3 mm, 3.5 mm and 4.5 mm — so you can match the plug to the hole instead of forcing one size into all of them.
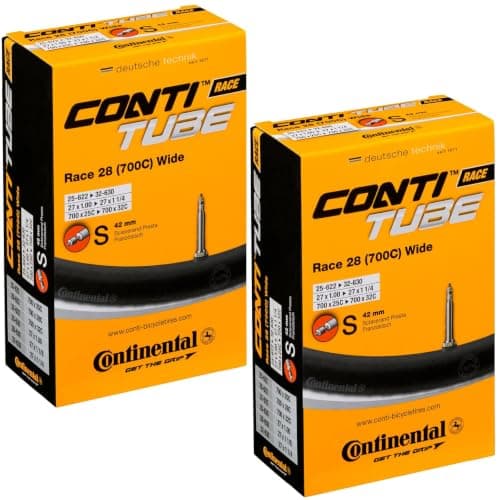
Continental Race 28 Inner Tube
The bottom of the ladder. When the casing is cut or the plugs will not hold, a tube ends the ride on a bike rather than on foot.
We haven’t tested any of these — they’re the parts the job above calls for, listed so you don’t have to go hunting. Prices are live from Amazon and we earn a commission if you buy. Prices as of October 18, 2026. #ad
Level 3 — Boot it
A cut — as opposed to a puncture — is a hole with length, usually from a flint or a rock strike on the sidewall. No plug bridges a cut reliably, because there is no shoulder of casing for it to grip. What works is a boot: a stiff patch placed on the inside of the casing to span the damage and stop the tube or the sealant extruding through it.
Booting means breaking the bead, so you have already lost the sealant seal. Accept that, and finish the job properly: boot the cut, then fit a tube on top of the boot. Riding a booted tubeless tire on sealant alone is optimistic; a cut long enough to need a boot is usually a tire to replace when you get home.
Level 4 — Fit a tube
The universal fallback, and the reason every tubeless rider still carries one. Park Tool’s published position on tubeless repair is unsentimental — in general, punctures in tubeless tires cannot be repaired in the way an inner tube can be patched — so the tube in your pocket is not made redundant by the sealant in your tire.
Two tubeless-specific details that catch people out:
- The valve has to come out first. A tubeless valve is fixed through the rim with a lockring; it must be removed before a tube can go in. That lockring is often finger-tight-plus, and cold hands do not help.
- Everything will be covered in sealant. It goes everywhere. Get the tire bead clear of sealant where you can, because latex on the rim bed makes fitting a tube slippery work, and check the inside of the casing for whatever caused the puncture before the tube goes in.
The rest of the procedure is identical to a standard flat — two levers, check the casing, seat the bead evenly — and that is covered step by step in how to fix a flat.
CO2 and tubeless: the published warning
CO2 is the fastest way to re-inflate at the roadside, and Stan’s publishes a caveat that very few riders have read: CO2 is best used in an emergency, and Stan’s recommends letting the CO2 out after the ride and replacing it with regular air — because prolonged CO2 exposure can cause the sealant to separate and can degrade the liquid latex the sealant depends on.
So: use the cartridge to get home, then bleed the tire and re-inflate with a floor pump the same evening. That two-minute habit is the difference between sealant that works next month and sealant that has turned to lumps.
What actually prevents roadside tubeless repairs
Almost all of it is maintenance, not luck. Sealant dries out — a tire that has not been topped up in six months is running on latex-colored stains, and both the automatic sealing and the DART’s chemical bond depend on wet sealant being present. Pressure matters too: our gravel tire pressure guide works through why running too low invites pinch cuts and burps, and too high defeats the point of tubeless entirely.
And if you are still weighing whether tubeless is worth this at all, that is a fair question with an honest answer in tubeless versus tubes.
What we could not check
We have not plugged a tire on a rig, timed a seal, or compared plug brands under controlled conditions. The limits quoted here — the DART’s 5 mm threshold, its dependence on wet latex sealant, and the CO2 guidance — are Stan’s own published statements, read on 18 August 2026, and the repair ladder is standard workshop practice presented in the order that disturbs the system least.
The escalation ladder
Try these in order. Each step down the table disturbs more of the tubeless system, and once the bead is broken you have lost the sealant seal for the rest of the ride.
| Damage | Fix | Tire off the rim? | What it needs |
|---|---|---|---|
| Small puncture, hissing | Rotate hole down, spin, top up pressure | No | Wet sealant and a pump |
| Puncture sealant cannot close | Rope plug from the outside | No | Plug tool and plugs |
| Puncture larger than about 5 mm | DART or a doubled rope plug | No | Latex sealant still wet in the tire |
| Sidewall or casing cut | Boot the inside, then fit a tube | Yes | Tire boot, tube, levers |
| Bead unseated / burped | Reseat and inflate hard, then re-check | Sometimes | Volume — CO2 or a charge pump |
| Plugs will not hold | Remove the valve, fit a tube | Yes | Tube, levers, patience with sealant |
Three of the six rows never break the bead. That is the whole advantage tubeless has at the roadside — and the reason to carry plugs before you carry a spare tire.
Common questions
Can you plug a tubeless bike tire?
Yes — it is the standard roadside repair and it is done with the tire still on the rim. Rope plugs work mechanically; Stan’s DART works chemically, bonding with the latex sealant already in the tire, and Stan’s states it is designed for punctures larger than 5 mm and cannot bond if the sealant has dried up. Insert at the angle the puncture went in, reinflate, and spin the wheel to bring sealant to the plug.
Should I use CO2 in a tubeless tire?
For an emergency, yes — but bleed it out afterwards. Stan’s recommends letting the CO2 out after the ride and replacing it with regular air, because prolonged CO2 exposure can cause the sealant to separate and can degrade the liquid latex it depends on. Use the cartridge to get home, then re-inflate with a floor pump.
When do I have to fit a tube in a tubeless tire?
When the casing is cut rather than punctured, when plugs will not hold, or when the sealant has dried out and there is nothing to seal with. Remove the tubeless valve first — the lockring has to come off before a tube will fit — and check the inside of the casing for whatever caused the flat. Park Tool’s published position is that tubeless punctures generally cannot be repaired the way a tube can be patched, which is why the tube stays in your pocket.
How do I find a tubeless puncture?
While it is still leaking. Listen for the hiss, look for the spray of sealant, and if it has already partly sealed, look for the wet patch or the small crust of dried latex on the tread. Once a hole has sealed and dried, finding it again at the roadside is close to impossible — which is why the first move is always to spin the wheel and look, not to start dismantling.
Will a plug ruin the tire permanently?
No. A plugged tubeless tire is a normally serviceable tire, and plenty of riders leave plugs in for the life of the casing. What does end a tire is a cut long enough to need a boot: a boot plus a tube gets you home, but a casing with a slit in it has lost structural integrity and should be replaced rather than trusted at pressure.
Sources
- Stan's NoTubes — DART tool ("dual action repair for tubeless"; the treated fabric seals by filling the puncture and reacting with liquid latex sealant inside to form a chemical and mechanical seal; designed for punctures larger than 5 mm; if the sealant is dried up, the DART cannot bond) — retrieved 2026-08-18
- Stan's NoTubes — Sealant support (CO2 "is best used in an emergency situation"; Stan's recommends letting the CO2 out after the ride and replacing it with regular air; prolonged CO2 exposure can cause the sealant to separate and can degrade the liquid latex) — retrieved 2026-08-18
- Park Tool — Tubeless tire system set-up and repair ("in general, punctures in tubeless tires cannot be repaired" in the way an inner tube can be patched) — retrieved 2026-08-18
Read next
- How to fix a flat
The tube procedure this page falls back to, in full.
- How to set up tubeless tires
Sealant volumes and top-up intervals — the maintenance that prevents all this.
- The best tubeless sealant
Which bottle, at what dose — and which makers publish a service interval at all.
- Tubeless vs tubes
Whether the roadside trade-off is worth it for your riding.
- The best bike pumps
Including the charge-chamber pump that reseats a burped bead at home.
We haven’t ridden or tested any of the products on this page, and we don’t pretend otherwise. Read how we research — or tell us we’re wrong and we’ll log the correction.