How to Wax a Bike Chain
Waxing is 20% wax and 80% preparation. Get the strip wrong and nothing else you do matters — here is the whole process with the makers' own numbers.
Heads up: we earn a commission if you buy through the links on this page, at no extra cost to you. It never decides what makes the list — here’s how that works.
Waxing fails for one reason far more often than any other: the chain was not clean enough. Wax has to bond to bare metal. A new chain arrives coated in a heavy factory grease that is deliberately good at staying put, and an old chain carries a mixture of lube and road grit that is worse. If either is still there when the chain goes in the pot, you get a chain that sheds wax in the first ten miles and a conclusion that waxing does not work.
The good news is that the process is entirely published. Both major immersion-wax makers set out their own procedures, with temperatures, times and mileages, and this page follows them rather than inventing a house method. Where they differ — and they do differ, on temperature — we have kept them separate.
Step 1 — Strip the chain
Take the chain off the bike. This is what quick links are for; if your chain has one, a pair of pliers or a quick-link tool opens it in seconds. Then get every trace of grease off it. Silca publishes two home methods:
- The bottle method.Put the chain in a sealed container with mineral spirits, “completely cover chain… shake vigorously for at least two minutes”, then repeat the shake with degreaser for about five minutes.
- The ultrasonic method. Suspend the chain in a container of mineral spirits inside an ultrasonic tank of water and run a 30-minute cycle.
Either way, the drying step is not optional: “Allow the chain to dry for at least 15 minutes before any waxing”. Water or solvent trapped in the rollers turns to steam in a hot wax pot, which spits.
An on-bike chain scrubber, of the kind Park Tool documents, is a good tool for routine cleaning and is notenough on its own for a first waxing — it cleans the outside well and cannot flush the factory grease out of the rollers. Use it for the maintenance described in our chain cleaning guide; use solvent for the strip.
What the process needs
Not a ranking — this is the kit the procedure above and below assumes. The wax and the solvent are the job; the drip bottle is for top-ups between full waxes and for the ride where you get caught in the rain.
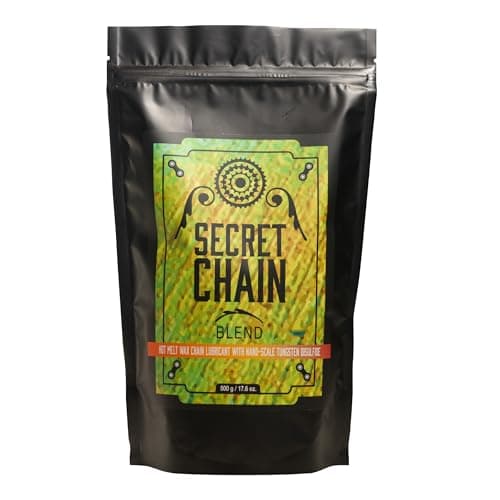
SILCA Secret Chain Blend Hot Melt Wax
The immersion wax itself. Silca publishes the melting range and the re-wax interval, so you are following a documented process rather than guessing.
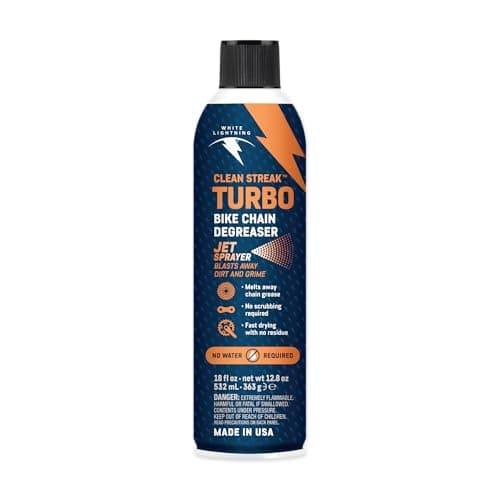
White Lightning Clean Streak
A solvent degreaser for the strip. The factory grease on a new chain is the thing standing between you and wax that stays put.
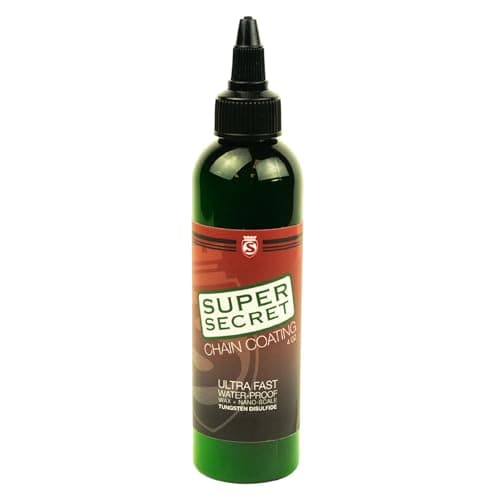
Silca Super Secret Chain Lube
Drip wax for topping up between full waxes, and the bottle you carry when a wet ride strips the chain mid-day.
We haven’t tested any of these — they’re the parts the job above calls for, listed so you don’t have to go hunting. Prices are live from Amazon and we earn a commission if you buy. Prices as of October 18, 2026. #ad
Step 2 — Set up the pot
You need a heat source you can hold at a stable temperature. The usual home answer is a cheap slow cooker dedicated permanently to wax — once it has been used for this it never goes back to food. Silca also documents a gentler route: put the sealed bag of wax into a pot of water and bring the water to a boil until the wax melts, which keeps the wax off direct heat entirely.
Rig a hanger before you start. A bent spoke through the chain, a coat hanger, or a length of wire — you need to be able to lift the chain out and hang it without touching it.
Step 3 — Temperature, by blend
This is where the two published procedures diverge, and the honest instruction is to follow the wax you actually bought:
- Silca Secret Chain Blend: “Heat the wax to between 65-88C (150-190F)”. Silca also notes that heating higher to melt faster and then dropping to the working temperature is the quickest route to application.
- Molten Speed Wax: “heat to 200°F (93°C)”, then turn the heat off before agitating.
Do not split the difference and do not go higher. Overheated wax degrades, smokes, and is a genuine fire risk — this is hot flammable liquid on a heat source in a garage. Work in a ventilated space, keep it off open flame, and do not leave it unattended.
Step 4 — Dip and agitate
Lower the chain in on its hanger and let the air out of it. Silca’s instruction is to allow all the air bubbles to escape and swish the chain around; Molten Speed Wax is more specific, calling for the heat to be turned off at temperature and the chain agitated rigorously for 45 seconds (race chains) or 60 seconds (training chains). The agitation is what gets molten wax between the rollers and the pins, which is the entire advantage immersion has over a bottle.
Silca adds a useful timing note for lifting the chain out: wait until the wax is approaching its hardening point, because leaving it in as the wax thickens keeps more wax in the chain.
Step 5 — Hang, cool, and break every link free
Hang the chain somewhere it can drip and cool. Silca gives about 15 minutes to cool enough to handle; Molten Speed Wax specifies 20–25 minutes to finish cooling. The chain will come out stiff — that is normal and it is the reason for the last step.
Break every link free before the chain goes back on the bike. MSW says it in as many words: articulate each link to loosen the wax bond. Run the chain back and forth over your hands, flex it laterally, and work along its whole length. A waxed chain installed stiff shifts badly and drops off the bottom of the cassette, and riders regularly blame the wax for what is really a skipped step.
Step 6 — Fit it, and expect flakes
Refit the chain with the quick link. The first few miles will shed loose surface wax; that is the excess leaving, not the wax failing. After that, a waxed drivetrain stays visibly clean — the tell that it is working is that your fingers stay clean when you touch the chain.
When to do it again
The published intervals differ by blend and by conditions, which is a genuinely useful thing to know before you commit:
- Silca quotes up to 300 miles per application, with a top-up with drip wax or a re-wax after 200 miles of clean riding.
- Molten Speed Wax quotes about 300 miles for training chains and up to 1,000 miles for race chains on average.
- In wet or muddy conditions, MSW’s instruction is blunt: re-wax after each ride.
The re-wax itself is far quicker than the first time. Both makers say the full cleaning process is not needed again — wipe the chain free of debris and drop it back into the melted wax. That is what makes the two-chain rotation the standard home setup: one chain on the bike, one in the pot, swapped in the two minutes a quick link takes.
The honest downsides
Waxing is not a free win, and three things about it genuinely annoy people. There is no roadside re-lube — if you get caught in a day of rain, the wax washes out and you need a drip bottle in your pocket. It is an evening the first time. And a wax setup does not travel: the chain has to come off, so a mid-trip re-wax is not happening in a hotel room.
If any of that sounds like too much, drip wax gets you most of the contamination benefit from a bottle — see the chain wax roundup for the drip options, or wet versus dry lube if you would rather stay with oil entirely.
What we can and cannot tell you
Every temperature, time and mileage on this page is quoted from Silca’s or Molten Speed Wax’s own published instructions, read on 18 August 2026 and linked below. We have not run a chain-wear test, measured watts saved, or compared blends on a rig — and where the two makers disagree, we have printed both figures rather than picking one. The one thing this page asserts on its own authority is the order of operations, which is the same in both procedures.
If the procedure above has put you off, that is a legitimate conclusion and there is a less demanding route: drip wax versus hot melt wax covers what you give up, which is mostly a published reapplication interval.
The two published procedures, side by side
Both makers publish complete instructions, and they do not agree on every number. Follow the column for the wax in your pot — not the average of the two.
| Step | SILCA Secret Chain Blend | Molten Speed Wax |
|---|---|---|
| Chain preparation | Mineral spirits: 2 min shake, then ~5 min with degreaser; or a 30-minute ultrasonic cycle | Chain must arrive "sparkling clean and oil free"; training chains in dry conditions can go straight in |
| Drying before wax | At least 15 minutes hanging | Chain must be dry and oil-free |
| Wax temperature | 65–88°C (150–190°F) | 200°F (93°C), heat off before agitating |
| Agitation | Let all air bubbles escape; swish the chain | 45 seconds (race) or 60 seconds (training) |
| Cooling | Hang until cool enough to handle, about 15 minutes | 20–25 minutes to finish cooling |
| Before refitting | Remove as the wax approaches hardening to keep wax in the chain | Break free (articulate) every link |
| Re-wax interval | Up to 300 miles; top-up or re-wax after 200 clean miles | ~300 miles training; up to 1,000 race; after every wet or muddy ride |
The temperature row is the one to notice: 88°C versus 93°C is a real disagreement between two makers about their own blends. We have not tested either, so both are printed as published.
Common questions
Do I have to strip a new chain before waxing it?
Yes, and it is the step that decides whether waxing works. Factory chain grease is engineered to stay on the chain through shipping and storage; wax cannot bond through it. Silca’s published method is mineral spirits — a two-minute shake, then about five minutes with degreaser — followed by at least fifteen minutes of drying.
What temperature should chain wax be?
Whatever your blend’s maker publishes. Silca specifies 65–88°C (150–190°F); Molten Speed Wax specifies 200°F (93°C). Do not exceed the published figure: overheated wax degrades and smokes, and hot flammable liquid on an unattended heat source is the one genuine hazard in this process.
Why is my waxed chain stiff and shifting badly?
You skipped the last step. A chain comes out of the pot with the links bonded by cooled wax, and Molten Speed Wax’s directions explicitly say to break each link free before installation. Flex the whole chain laterally and run it back and forth through your hands until every link articulates.
How often do I need to re-wax?
Roughly every 200–300 miles in clean conditions on both makers’ published figures, and after every ride in wet or muddy conditions per Molten Speed Wax. Re-waxing is quick: neither maker requires the full clean again — wipe the chain and drop it back in the melted wax.
Can I wax the chain while it's on the bike?
Not with immersion wax — the chain has to come off and go in a pot. That is what quick links are for, and it is why most home waxers run two chains and alternate them. If taking the chain off is a deal-breaker, drip wax applies on the bike and gets you most of the cleanliness benefit; see the chain wax roundup.
Sources
- SILCA — How to clean and wax a bike chain (bottle method: "Completely cover chain inside the ... bottle with mineral spirits ... Shake vigorously for at least two minutes", then ~5 minutes with degreaser; ultrasonic: 30-minute cycle; "Allow the chain to dry for at least 15 minutes before any waxing"; "Heat the wax to between 65-88C (150-190F)"; hang to cool about 15 minutes) — retrieved 2026-08-18
- SILCA — Secret Chain Blend product page (up to 300 miles per application; top-up or re-wax after 200 miles of clean riding; re-waxing does not require repeating the cleaning process) — retrieved 2026-08-18
- Molten Speed Wax — waxing directions ("heat to 200°F (93°C)"; agitate 45 seconds for race chains, 60 for training; "allow chain to finish cooling (20 - 25 minutes)"; "Break free (articulate to loosen wax bond) each link in chain"; ~300 miles training, up to 1,000 race; "re-wax after each ride" in wet or muddy conditions) — retrieved 2026-08-18
- Park Tool — Chain cleaning with a Park Tool chain scrubber (the published on-bike cleaning technique, useful for maintenance and insufficient for a first strip) — retrieved 2026-08-18
Read next
- The best chain wax
Immersion and drip waxes compared, with live cost per milliliter.
- How to clean a bike chain
Routine cleaning — and why a scrubber is not a strip.
- The best bike degreasers
What to strip the chain with before wax goes near it.
- When to replace a bike chain
The wear numbers waxing is trying to protect.
We haven’t ridden or tested any of the products on this page, and we don’t pretend otherwise. Read how we research — or tell us we’re wrong and we’ll log the correction.