How to Install an E-Bike Conversion Kit
Most failed conversions fail before the parcel arrives, on a measurement nobody took. Here is the order to do it in, and the safety items that are not negotiable.
Heads up: we earn a commission if you buy through the links on this page, at no extra cost to you. It never decides what makes the list — here’s how that works.
Almost every conversion that goes wrong went wrong before the kit shipped. The bottom bracket shell was the wrong width, the wheel was 700c and the motor was built into a 26″ rim, the dropouts were the wrong spacing, or the frame was carbon. None of those is a fitting problem. They are all measuring problems, and they are all avoidable with a ruler and twenty minutes.
This page is deliberately not a step-by-step for one specific kit. Every kit ships with its own manual and its own torque figures, and those are the instructions to follow — we have not installed these kits and will not pretend to have. What follows is the order the job goes in, the measurements that decide whether it can happen at all, and the safety items that are not optional whichever kit you buy.
Before you order: five measurements
- Bottom bracket type and shell width (mid-drives).Threaded English/BSA shells are what mid-drive kits are designed around. Park Tool’s bottom bracket standards guide sets out the specification: English threading is 1.37″ × 24 TPI, and the two common shell widths are 68 mm and 73 mm. Press-fit and oversized shells generally are not compatible with a standard mid-drive clamp.
- Wheel size (hub kits).The motor is laced into a specific rim. A kit listed for 26″ will not become a 700c wheel. Read the size printed on your tire sidewall, not the one you remember.
- Dropout spacing (rear hub kits). Measure between the inner faces of the dropouts with the wheel out. Common numbers are 135 mm on hybrids and older mountain bikes; modern road and thru-axle bikes are a different problem entirely.
- Frame material and condition. Steel and aluminum are candidates. Carbon frames and forks are not: they are engineered for riding loads, not for a clamped motor or the rotational force a hub axle applies to a dropout.
- Brakes. Discs preferred. If the bike has rim brakes, you are adding several kilograms and a good deal of speed to a braking system that was sized for neither.
If you have not chosen a kit yet, our conversion kit roundup covers the options and the 750-watt federal line, and conversion versus a complete e-bike covers whether to do this at all.
What the job needs on the bench
Not a ranking — the tools this job assumes, beyond the kit itself and whatever bottom-bracket tool your bike's cups require. The stand and the torque wrench are the two that turn a frustrating evening into a straightforward one.
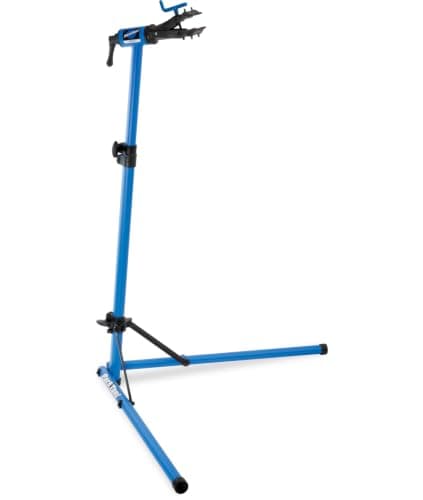
Park Tool PCS-9.3
Both hands free, bike at chest height, cranks turning. Park Tool publishes an 80 lb (36 kg) capacity, which matters once a battery is on the frame.
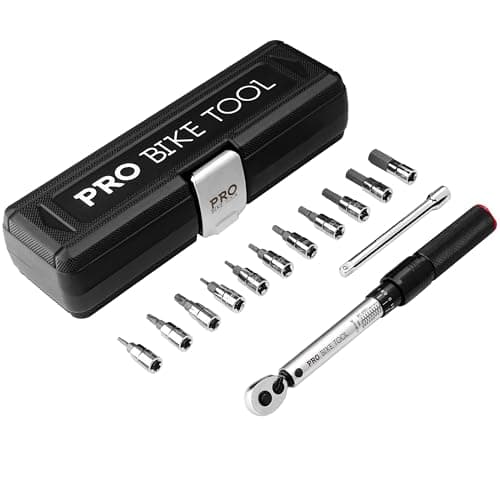
PRO BIKE TOOL Torque Wrench Set
A 2.2–16.9 N·m click range per the listing, for the bicycle-side fasteners. Motor-specific torques come from your kit's own manual.
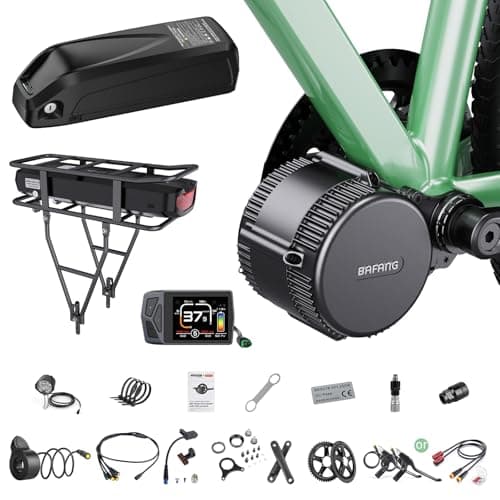
Bafang BBS02B Mid-Drive Kit
The mid-drive kit this job is usually about. Check your bottom bracket shell width before ordering — that measurement decides everything.
We haven’t tested any of these — they’re the parts the job above calls for, listed so you don’t have to go hunting. Prices are live from Amazon and we earn a commission if you buy. Prices as of October 18, 2026. #ad
The order of work
1. Strip what has to come off.For a mid-drive: cranks, then the bottom bracket cups. Park Tool’s threaded bottom bracket removal guide is the reference, and it contains the detail that catches most first-timers: on English threading the drive side is a left-hand thread and undoes clockwise. For a hub kit: the wheel, the tire, the tube and the cassette or freewheel.
2. Fit the motor. Mid-drive: the motor spindle passes through the shell and is clamped by a lock nut and a fixing plate. Hub: the wheel goes in the dropouts like any wheel, but with the axle flats aligned and the cable exiting where nothing will snag it.
3. Fit the torque arm — if it is a hub motor, this step is not optional. A hub motor applies rotational force directly to the dropout, which is not a load dropouts were designed to take. Aluminum dropouts and any front fork need a torque arm; many riders fit two on a powerful rear hub. This is the single most important safety item in a hub conversion, and it costs almost nothing.
4. Fit the sensors and controls. Pedal-assist sensor at the bottom bracket, display and throttle on the bar, and brake cut-off levers or sensors so that touching a brake kills the motor. Do not skip the cut-offs to save a job: a pedal-assist sensor that keeps commanding power while you are braking is exactly the failure you do not want to discover on a descent.
5. Mount the battery. Bottle-cage mounts, a rear rack or a frame bag. Two rules: it must not move, and the cable must not be able to reach a spinning wheel or the chain. A battery that shifts under braking is a battery that eventually lands on the road.
6. Route and secure every cable. Follow existing housing runs where you can, leave enough slack for full steering lock in both directions, and check nothing is stretched or pinched with the bars turned fully. Cable ties every few inches, ends trimmed.
7. Torque everything to the published figures.Motor-side fasteners to the figures in your kit’s manual; bicycle-side fasteners to the component makers’ published numbers — our bike bolt torque guidecollects them, including the ones a 20 N·m wrench cannot reach.
The first ride, and what to check afterwards
Test in a car park before a road. Check that the motor cuts when you touch either brake, that assist engages smoothly rather than surging, and that nothing rubs at full steering lock. Then ride gently for a few miles and re-check every fastener: motor mount, torque arm, battery mount, and the axle nuts on a hub kit. Things settle on the first ride, and a hub axle that has begun to move announces itself early if you look.
Then treat it as a new bike with new maintenance needs. A converted bike puts more torque through the same chain and more heat through the same brakes — our e-bike maintenance guide covers what changes, and chain wear arrives faster than it used to.
Battery safety, briefly and seriously
The motor is the interesting part of a conversion and the battery is the risky one. A conversion cannot hold a system-level certification, so the battery’s own certification is what you have — UL 2271 is the standard for batteries used in light electric vehicle applications. Buy a pack whose cells and certification you can identify, charge it where a fire would not trap anyone, and do not leave it charging unattended overnight. Our guide on charging and storing an e-bike battery covers the practice in detail.
Keep it legal while you are at it
If the finished bike is meant to be a bicycle, the federal definition is the line: fully operable pedals, a motor of less than 750 watts, and under 20 mph on motor power alone. Several controllers ship with configurable speed limits — set them before the first ride rather than after a conversation with someone in uniform. Our e-bike classes explainer covers what the three classes control.
What we can and cannot tell you
We have not installed a conversion kit, and this page contains no first-hand account of one. The bicycle-side standards quoted here — English bottom bracket threading at 1.37″ × 24 TPI, 68 and 73 mm shell widths, the drive-side left-hand thread — are Park Tool’s published figures. Every motor-specific torque and wiring detail belongs to your kit’s own manual, and where this page says “follow the manual”, that is not a hedge: it is the only honest instruction available to a publisher that has not built your particular bike.
Measure before you order
Every row here is a purchase-blocking check. The bottom bracket figures are Park Tool’s published standards; the rest are measurements only you can take.
| Check | Applies to | What you are looking for | If it is wrong |
|---|---|---|---|
| Bottom bracket type | Mid-drive | Threaded English/BSA, 1.37" × 24 TPI | Press-fit shells are generally incompatible |
| Shell width | Mid-drive | 68 mm or 73 mm | Wrong spacer set — check the kit's stated widths |
| Wheel size | Hub kit | The size printed on the tire sidewall | The motor is laced into the wrong rim. Return it |
| Dropout spacing | Rear hub kit | Measured between dropout inner faces | Axle will not fit, or fits under stress |
| Dropout / fork material | Any hub kit | Steel preferred; aluminum needs torque arms | Carbon: do not convert |
| Brake type | Everything | Discs strongly preferred | Rim brakes on a heavier, faster bike |
| Battery mounting point | Everything | Bottle bosses, rack or frame bag | Nowhere secure to put the heaviest part |
Seven checks, twenty minutes, one ruler. This table is the difference between a project and a return, and it is the part of the job most people skip.
Common questions
How hard is it to install an e-bike conversion kit?
A hub kit is roughly a wheel swap plus wiring — within reach of anyone comfortable changing a tire and routing cables. A mid-drive is a bottom bracket job, which means removing cranks and cups with the right tools and knowing that the drive side is a left-hand thread. Neither is difficult; both are unforgiving of the measurements you did not take before ordering.
Do I really need a torque arm?
On any hub motor, yes — treat it as part of the kit rather than an accessory, especially on a front wheel or aluminum dropouts. A hub motor applies rotational force directly to the dropout, which is not a load dropouts are designed to resist. It is a cheap steel plate that prevents the one genuinely dangerous failure mode in a conversion.
What bottom bracket do I need for a mid-drive kit?
A threaded English/BSA shell. Park Tool publishes the specification as 1.37″ × 24 TPI, in shell widths of 68 mm or 73 mm, with a left-hand thread on the drive side. Press-fit and oversized shells are generally not compatible with standard mid-drive kits, so identify your shell before you order anything.
Can I convert a carbon bike?
No. Carbon frames and forks are engineered for the loads of riding, not for a clamped motor body or the rotational force a hub axle applies to a dropout. The failure modes are not gradual. If your only bike is carbon, buying a complete e-bike is the correct answer.
How long does a conversion take?
Plan an unhurried evening for a hub kit and a longer one for a mid-drive, plus time to re-check everything after the first ride. The measuring beforehand takes twenty minutes and saves most of the ways this goes wrong. If you are working to a deadline, do it the weekend before you need the bike, not the morning of.
Sources
- Park Tool — Bottom bracket standards and terminology (English/BSA threading specified as 1.37" × 24 TPI, also called BSC, BC, ISO, British and Euro; two common shell widths of 68 mm and 73 mm; on English threading the drive side uses a left-hand thread) — retrieved 2026-08-18
- Park Tool — Threaded bottom bracket removal and installation (the published procedure for removing cups, including thread direction) — retrieved 2026-08-18
- 15 U.S.C. § 2085(b) — federal low-speed electric bicycle definition (fully operable pedals; motor of less than 750 watts; under 20 mph on motor power alone with a 170 lb operator) — retrieved 2026-08-18
- UL Solutions — battery safety testing and certification (UL 2271, the standard for batteries used in light electric vehicle applications) — retrieved 2026-08-18
- Kit-specific torque figures and wiring diagrams: each kit's own manual. We have not installed these kits and do not reproduce figures we cannot verify.
Read next
- The best e-bike conversion kits
Which kit, and the 750-watt legal line.
- Conversion kit vs a new e-bike
Whether to do this at all.
- Bike bolt torque guide
Published figures for every bicycle-side fastener you will touch.
- How to charge and store an e-bike battery
The riskiest component in the whole project.
We haven’t ridden or tested any of the products on this page, and we don’t pretend otherwise. Read how we research — or tell us we’re wrong and we’ll log the correction.