How to Size a Bike Chain
New chains come long on purpose. Cutting one is the only step in this job you cannot take back, so it is worth doing in the right order and measuring twice.

Heads up: we earn a commission if you buy through the links on this page, at no extra cost to you. It never decides what makes the list — here’s how that works.
Replacement chains are sold longer than any bike needs. Park Tool puts it in one line: “Replacement chains for bicycles are usually longer than you need.” Your job is to work out how much to remove, and it is the only step in a chain replacement that cannot be reversed. Cut two links short and you own a shorter chain, not a mistake.
We have not devised a method here. What follows is Park Tool’s published procedure, read on 18 September 2026, quoted and attributed, with the decisions laid out in the order you will meet them. Shimano publishes its own chain instructions in its chain dealer manual, and if your drivetrain is Shimano it is worth having open alongside.
Before anything: which kind of chain do you have?
Park Tool defines two types of multi-speed chain, and the difference decides how you get the old one off. Master link chains (also called quick links) join with two removable outer plates. Connecting rivet chains join with a special rivet that looks visibly different from the others. Find yours by turning the cranks slowly and watching the chain go past.
If there is a master link, a master link pliers opens it in a second. If your chain is worn out anyway, Park Tool notes you can ignore the master link entirely and simply cut the chain with a chain tool. On a connecting-rivet chain, pick a rivet “at least a couple of links away from any connecting rivet already installed”, and drive the pin out in a straight line.
Method 1: copy the old chain (if it was the right length)
This is the fastest route and the one to use whenever the old chain worked. Before you remove it, check that it actually was the right length, because copying a badly sized chain just repeats the error. Park Tool’s two-part check:
Shift into the largest chainring and the largest rear cog. The chain should be long enough to make that shift with “two slight bends at each pulley of the rear derailleur”. Then shift to the smallest chainring and smallest sprocket: “There should be no slack in the chain, and the derailleur should not pull so far back that the chain contacts itself.” If both hold, the old chain is your template.
Lay the old chain beside the new one and match them rivet by rivet, lining up outer plates with outer plates or inner with inner. Install half of the master link on the new chain first if it uses one, so the comparison is true. And note Park Tool’s caution: “old chains will lengthen as they wear” — so count rivets, do not match overall length by eye.
What the job above needs on the bench
Not a ranking — these are the three things the procedure calls for. A chain in the right speed count, a tool that can drive a rivet out, and the gauge that tells you whether the cassette is going with it.
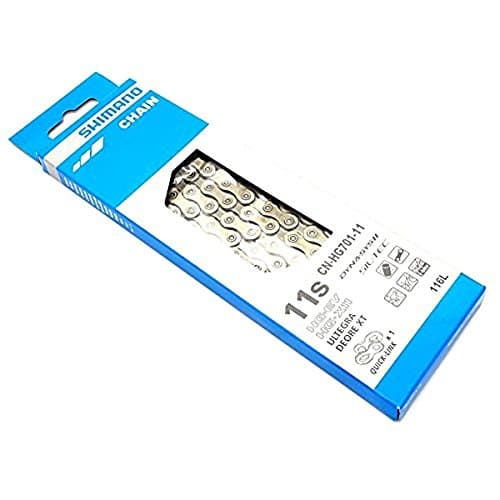
Shimano CN-HG701 Ultegra 11-Speed Chain
An 11-speed chain with a quick link, so the join is reusable. Speed count must match your drivetrain — check before ordering, because an 11-speed chain does not belong on a 12-speed cassette.
$39.30 · View on Amazon$46.00 −15%
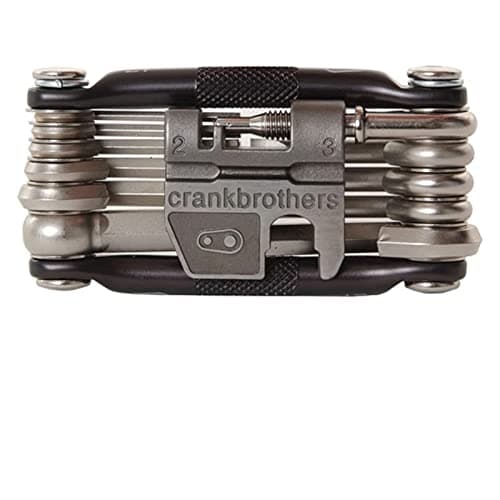
Crankbrothers M17
The chain breaker you already carry: 17 tools including a chain tool, so the cut can be made on the bench or at the roadside. A dedicated bench chain tool is easier; this one is always there.
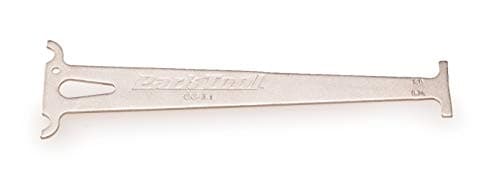
Park Tool CC-3.2 Chain Checker
Go/no-go gauge for 0.5% and 0.75% elongation, listed for 5-12 speed. Read the old chain before you fit the new one — past 0.75% you are likely buying a cassette too.
We haven’t tested any of these — they’re the parts the job above calls for, listed so you don’t have to go hunting. Prices are live from Amazon and we earn a commission if you buy. Prices as of October 18, 2026. #ad
Method 2: largest cog, largest chainring, plus two rivets
Use this when there is no usable old chain — a new build, a cassette or derailleur change, or an old chain that was the wrong length. Park Tool states the scope precisely: this method is for bikes “with rear sprockets that are a maximum of 36 teeth or smaller”.
The sequence, as published:
Shift the front derailleur onto the largest chainring and the rear derailleur to the smallest cog, which moves the rear derailleur out of the way. Wrap the chain around the largest rear cog, pass the end through the front derailleur cage onto the largest chainring, and hold it at about the five o’clock position. Bypass the rear derailleur entirely. If the chain uses a master link, install half of it now — that accounts for the extra half inch it adds.
Pull the lower run snug and engage it on the chainring, making sure the chain is fully seated on the largest rear cog. Find the closest rivet where the two ends could actually be joined — inner plate to outer plate. That is your reference rivet. From it, add two rivets, which is one inch. That is the cutting point.
There is one wrinkle Park Tool calls out and most people hit: sometimes when you pull the lower section snug, an outer plate meets an outer plate, which cannot be joined. In that case add one rivet to reach a joinable point, treat that as the reference rivet, and add the two rivets from there.
The 1x exception: four rivets, not two
If your rear sprockets are 42 teeth or larger — a dedicated 1x setup, in other words — the maths changes. Park Tool’s method for those: route the chain over the front ring and the largest rear sprocket without passing through the rear derailleur, find the shortest length where inner and outer plates would connect, and from that rivet “count four additional rivets (two inches)”.
Getting this wrong on a wide-range 1x is worse than on a double, because the chain has further to travel between extremes and there is no front derailleur taking up the difference. If you are weighing up 1x against 2x in the first place, our 1x vs 2x comparison works through what the choice costs you elsewhere.
Two exceptions worth knowing before you cut
Chain guides. If the bike runs one, Park Tool says route the chain through the system before determining length. The rest of the process is unchanged — but a chain sized outside its guide will be short once it goes through.
Full suspension. The distance between the cogs and the chainrings changes as the suspension moves. Park Tool’s instruction is to disconnect the shock and compress the linkage until it is bottomed out before measuring. A chain sized with the suspension at rest can go tight at full compression, which is how rear derailleurs get destroyed.
Size the chain, but check the cassette first
A new chain on a worn cassette skips under load, and it is a genuinely miserable outcome — a fresh chain, correctly sized, that jumps every time you stand on the pedals. That is why the chain checker is on the bench in the block above. Park Tool publishes the reason: a worn chain can cause excessive wear to the rear cogs, “causing a much more expensive problem”, and its CC-3.2 indicates 0.5% and 0.75% wear, the points at which most chain makers suggest replacement.
Read the old chain before you throw it away. Under 0.5% and the cassette has probably survived. Past 0.75% and you should expect to replace both. Our chain wear guide covers how to use the gauge without fooling yourself, and why is my bike chain skipping is the page to read if the new chain is already installed and jumping.
Speed count is not a length question, but it will ruin your day
Chains are made in different widths for different speed counts, and a chain that is the right length in the wrong width shifts badly or not at all. Count the sprockets on your cassette before ordering. Our chain roundup states the speed count for every pick, and 11-speed vs 12-speed explains what actually changes between the two.
The order that saves you a chain
Check the old chain’s length while it is still on the bike. Measure its wear. Lay it beside the new one and count rivets, or wrap and add two (or four). Route through any chain guide, bottom out any suspension. Then cut. The whole procedure takes fifteen minutes and every minute of it happens before the irreversible bit.
One thing worth getting right before any of it: the tool. Chain width changes with speed count — Park Tool publishes 5.3 mm across the rivet at 12-speed against about 7 mm at 6, 7 and 8 — so a breaker is bought on published compatibility rather than price. The chain tool roundup ranks nine of them on what each maker actually names, including the one listing that covers SRAM Flattop.
Sizing is one step of a longer job, and if you are here because the chain is worn out rather than because you are building a bike, the rest of it is worth reading first. How to replace a bike chain carries Park Tool’s published procedure end to end: the two-part test that tells you whether the old chain was even the right length, which way to drive the connecting rivet and why, and the tight-link check at the end.
Common questions
How do I know how long my bike chain should be?
If the old chain was correct, lay it beside the new one and match rivet for rivet. If not, wrap the chain around the largest chainring and largest rear cog without passing it through the rear derailleur, find the closest joinable rivet, and add two rivets (one inch) for cassettes up to 36 teeth.
How do I size a chain for a 1x drivetrain?
For rear sprockets of 42 teeth or larger, Park Tool’s method is the same wrap largest-to-largest without the derailleur, then count four additional rivets (two inches) from the shortest joinable point rather than two.
How do I size a chain with no old chain to copy?
Use the wrap method: largest chainring, largest cog, bypassing the rear derailleur, then add two rivets (or four on a wide-range 1x). That is what the method exists for — new builds and drivetrain changes.
What if an outer plate meets an outer plate?
You cannot join there. Park Tool’s instruction is to add one rivet to reach a joinable point, call that the reference rivet, and then add the two additional rivets from it.
Do I need to check chain wear before replacing?
Check the old chain before you discard it. Under 0.5% elongation, a new chain will probably run on the existing cassette. Past 0.75%, expect to replace both — a fresh chain on worn cogs skips under load.
Can I make a chain longer again after cutting it?
Only by adding links from another chain of the same speed and brand, which needs spare links and a rivet you can drive. Treat the cut as permanent and measure twice.
Sources
- Park Tool — Chain Length Sizing (“Replacement chains for bicycles are usually longer than you need”; the two chain types, master link and connecting rivet; the pre-removal check for “two slight bends at each pulley” in largest-largest and no slack in smallest-smallest; “old chains will lengthen as they wear”; the largest-cog/largest-chainring method for “rear sprockets that are a maximum of 36 teeth or smaller” with “two rivets (one inch)” added from the reference rivet; the outer-plate-meets-outer-plate exception; the 1x method for sprockets “42 tooth and larger” counting “four additional rivets (two inches)”; routing through a chain guide before measuring; disconnecting the shock and bottoming out the linkage on full suspension) — retrieved 18 September 2026
- Park Tool — When to replace a chain on a bicycle (a worn chain “can cause excessive wear to the rear cogs”, “causing a much more expensive problem”) — retrieved 18 August 2026
- Park Tool — CC-3.2 chain wear indicator (indicates 0.5% and 0.75% wear, “the points at which most chain manufacturers suggest replacement”) — retrieved 18 August 2026
- Shimano — chain dealer manual DM-CN0001 (Shimano's own chain installation instructions) — retrieved 17 July 2026
- Google Autocomplete — “how to size a bike chain” returns “without old chain”, “correctly”, “1x”, “length”, “single speed” and “park tool” completions, plus the “how to measure a bike chain” family — retrieved 18 September 2026
Read next
- How to replace a bike chain
The whole job, of which sizing is one step.
- When to replace a bike chain
The measurement to take before you cut anything: 0.5% and 0.75% elongation.
- The best bike chain tools
Nine tools ranked on published compatibility — and who needs pliers instead.
- The best bike chains
Six chains with the speed count stated for every one.
- Why is my bike chain skipping?
What a new chain on a worn cassette feels like, and the other three causes.
- 11-speed vs 12-speed
Why the chain's width matters as much as its length.
- 1x vs 2x drivetrains
The setup that needs four rivets instead of two, and what else it changes.
- How to clean a bike chain
What to do with the new one so you are not sizing another next season.
We haven’t ridden or tested any of the products on this page, and we don’t pretend otherwise. Read how we research — or tell us we’re wrong and we’ll log the correction.