How to Replace a Bike Chain
Twenty minutes, two tools and one decision: does your chain have a master link or a connecting rivet? Everything below is Park Tool's published procedure, quoted rather than remembered.
Heads up: we earn a commission if you buy through the links on this page, at no extra cost to you. It never decides what makes the list — here’s how that works.
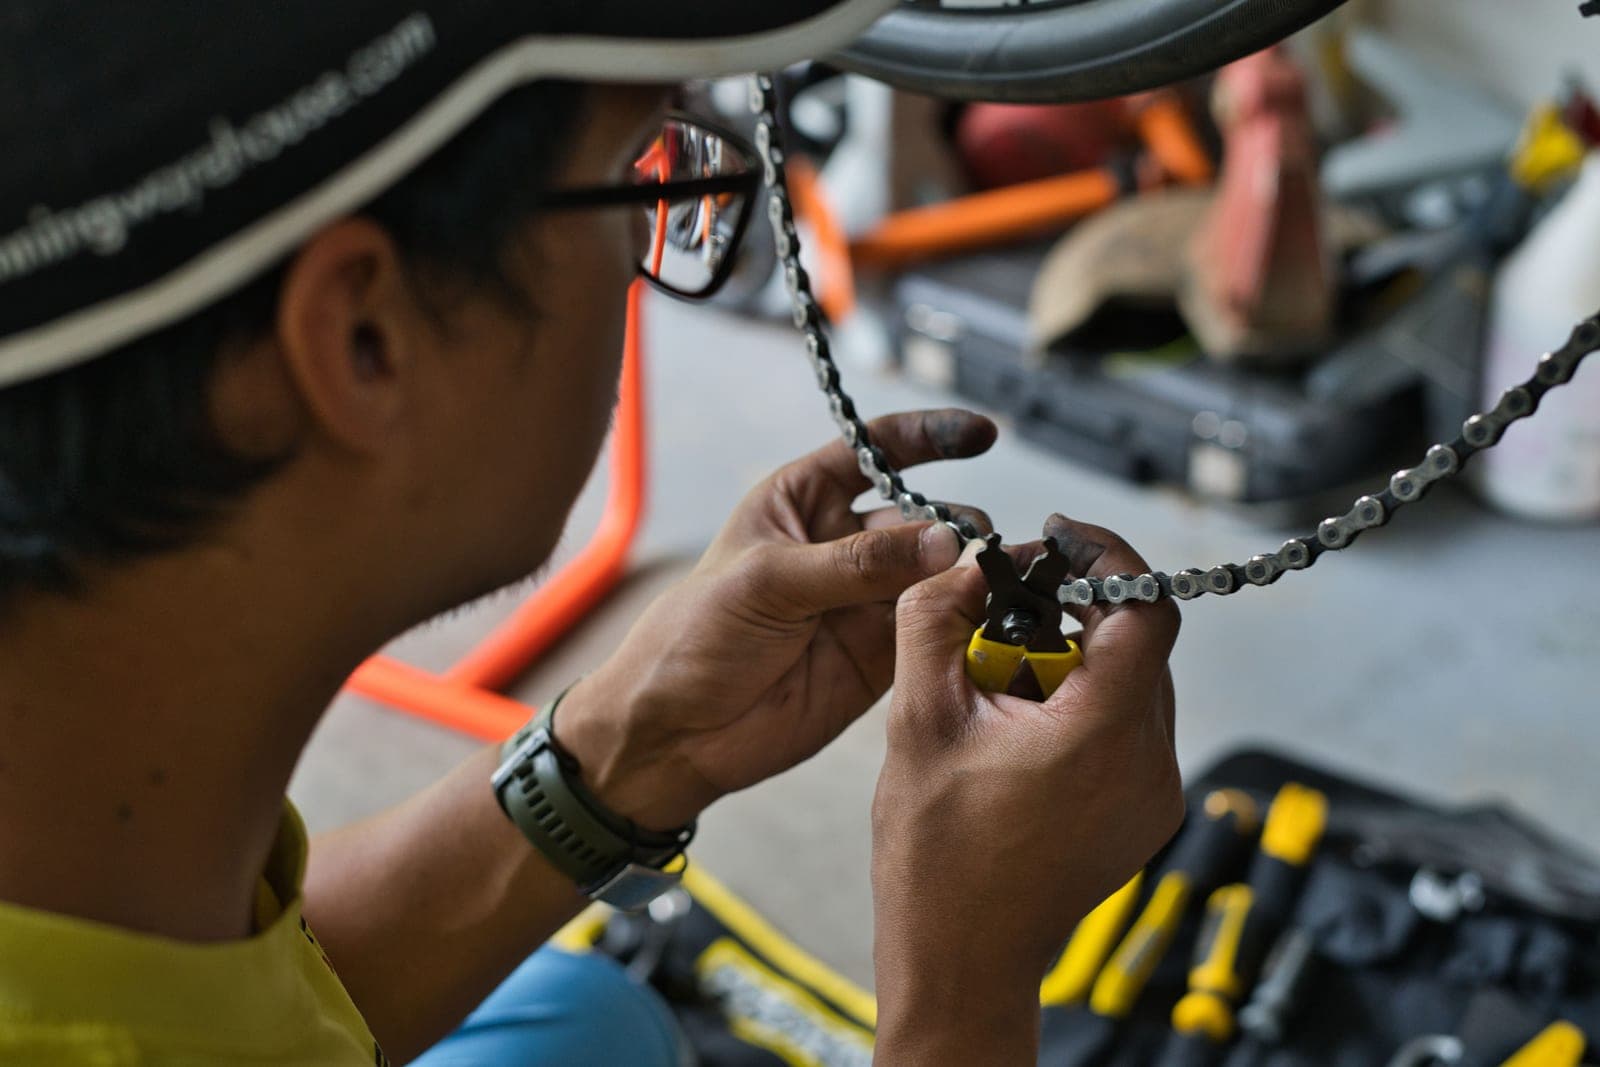
Look at your chain for a pair of odd-looking side plates — often a different colour. If they are there, you have a master link and you need a pair of master link pliers. If they are not, you have a connecting rivet and you need a chain tool. That one observation decides the whole job, and it is the first thing Park Tool’s own procedure asks you to make.
Everything procedural below is quoted from Park Tool’s published chain replacement article for derailleur bikes, read on 5 October 2026. We have not filmed ourselves doing this and we are not paraphrasing from memory — where there is a published instruction, it is in quotation marks and attributed.
One thing to establish before you start, because it decides whether you are replacing one part or three. Park Tool publishes replacement thresholds of 0.5% elongation for 11- and 12-speed chains, 0.75% for 10-speed and under, and 1.0% for single-speed — and warns at the end of the replacement article that if the new chain skips, “it could be a symptom of a worn cassette or freewheel cogs” from running the old one too long. If you have ignored the chain for years, budget for the cassette too. Our chain wear page covers the measurement.
Before you break anything: confirm the old chain was the right length
This is the step that gets skipped, and it is the one that makes everything after it easy, because a correctly sized old chain becomes the template for the new one. Park Tool publishes a two-part test:
Shift to the largest front and rear sprockets. “The chain should be able to make this shift with two slight bends in the chain as it wraps around each derailleur pulley.”
Then shift to the smallest cogs. “There should be no slack in the chain and the derailleur should not pull so far back that the chain contacts itself.”
If both are true, Park Tool’s conclusion is that “your old chain meets all these criteria, it is an acceptable length” — and you can size the new one against it. If either fails, you need to size from scratch, which is a different procedure with its own published figures: how to size a bike chain carries Park Tool’s two sizing methods including the four-rivet exception for 1x drivetrains with large sprockets.
What to look for before you buy the chain
Three checks, and getting any of them wrong means a chain that does not fit.
One: the speed count. Count the sprockets on the rear wheel. An 11-speed chain does not belong on a 12-speed cassette and vice versa, because chain width changes with cog spacing. Park Tool’s chain compatibility reference is the published source for this, and our chain tool rounduprecords its published width-by-speed-count figures — the reason a tool that fits one chain may not fit another.
Two: the brand, if it is SRAM 12-speed. Park Tool publishes that SRAM’s 12-speed Flattop chains are proprietary, with larger rollers than a typical chain. That is a compatibility fact with teeth, and it is covered on the chain roundup.
Three: whether it comes with a master link. Some do and some do not, and it changes which tool you need. Shimano’s CN-HG601 listing, for instance, publishes that it ships with the SM-CN900-11 quick link. If your new chain has one and your old one did not, you need the pliers rather than a pin.
The four things this job calls for
Not a ranking — these are the parts and tools Park Tool's own procedure lists, plus the gauge that tells you whether the job is due at all. You need one of the two joining tools, not both: pliers for a master link, a chain tool for a connecting rivet. Buy the chain that matches your speed count, not the one at the top of this block.
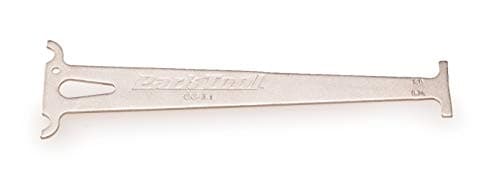
Park Tool CC-3.2 Chain Checker
The gauge that decides whether the chain is finished. Park Tool lists it for 5 to 12 speed, and it reads the published 0.5% and 0.75% thresholds directly rather than by ruler arithmetic.
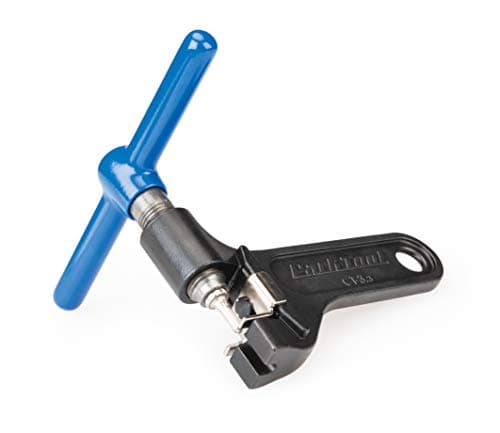
Park Tool CT-3.3 Chain Tool
The chain tool for a connecting-rivet chain, and for cutting any new chain to length. Park Tool publishes it as covering 5 to 12 speed and single speed chains, which is the whole range of this site's catalogue.
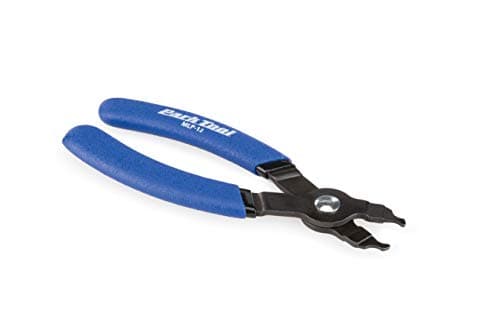
Park Tool MLP-1.2 Master Link Pliers
The master link pliers Park Tool's own procedure names by model for disengaging and seating a master link. If your chain has one of those odd-coloured plate pairs, this is the tool the published method asks for.
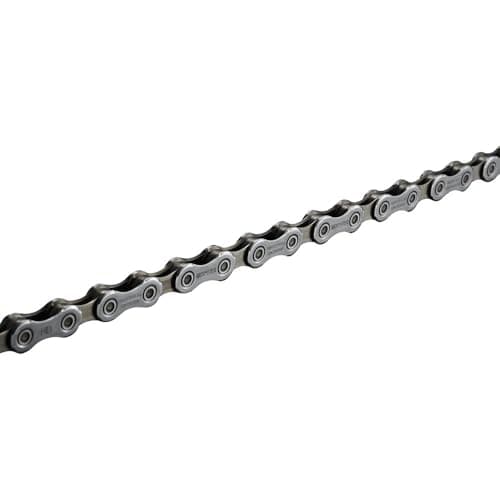
Shimano CN-HG601 105 11-Speed Chain
An 11-speed chain whose listing publishes both its road/MTB/e-bike compatibility and that it ships with the SM-CN900-11 quick link — so the joining decision is made for you. 126 links. Check your cog count before buying.
We haven’t tested any of these — they’re the parts the job above calls for, listed so you don’t have to go hunting. Prices are live from Amazon and we earn a commission if you buy. Prices as of October 18, 2026. #ad
Step one: get the tension off
Park Tool’s first move is optional and worth doing: “Optionally, remove the rear wheel from your bike. This will take tension off of the chain and make things a little easier.” On a bike in a repair stand it is a thirty-second job that makes the rest less fiddly.
Step two: break the old chain
If it has a master link. Park Tool: “Master links have a pair of unique side plates that are sometimes a different color. If a master link is present, position it in the lower section of chain and use a master link pliers such as the MLP-1.2 to disengage the link.”
And here is the line most guides leave out, which is genuinely liberating if you do not own the pliers: “If you have a chain tool and your chain is worn out, you can simply ignore the master link and break the chain using the chain tool some links away from the master link.” The chain is being thrown away. There is no reason to be precious about where it comes apart.
If it has a connecting rivet. Park Tool: “For connecting rivet chains, locate the special connecting rivet in your chain. Connecting rivets will appear visually different from the other rivets.” Then the warning that matters: “When selecting a rivet to break, make sure that it is several rivets away from any connecting rivets already installed in the chain.”
The technique is simple and unforgiving: “Bring the driving pin of the chain tool into contact with the rivet and ensure the chain tool pin is driving in a straight line into the rivet. Turn the handle with force and drive out the rivet.” A pin driven at an angle bends, and a bent tool pin is how this job turns into two jobs.
Step three: size the new chain against the old one
Park Tool’s instruction here is precise about something easy to get wrong: “When sizing to the original chain, always line up ends with outer plates. Insert the master link to get a true side-by-side comparison. It is also acceptable to line up ends with inner plates. The important thing is to always match inner to inner or outer to outer for an accurate length comparison.”
Then: “line up the chains, taking care to match them rivet by rivet, noting that old chains will lengthen as they wear. Once you have them side by side, simply cut the new chain to match the length of the old chain.”
That parenthetical about elongation is why you count rivets rather than measure with a tape. A worn chain is physically longer than a new one of the same link count — that is literally what chain wear is — so matching total length with a ruler would give you a chain with the wrong number of links.
Step four: route it
Two published details, both easy to miss.
Direction. “Some chains are directional and any logos or printed letters should face out towards the mechanic on the drive side.” Look at the side plates before you thread it.
Cage tabs. “Feed the chain through the rear derailleur as shown. Be aware of any tabs on the derailleur cage and route the chain on the correct side of the tab.” Getting this wrong produces a bike that appears to work in the stand and shifts appallingly.
Park Tool also notes the asymmetry between the two joining systems here: with a connecting rivet you must “lead with outer plates”, while “master link chains have inner plates on both ends so you can lead with either end”.
Step five: join it
Master link. “Inspect your master link for any arrows indicating the direction of travel. Connect the master link and engage it using master link pliers such as the MLP-1.2. Engage the pliers and pull outward to seat the link.” Park Tool also publishes a tool-free alternative: “position the master link on the upper run of chain, apply the rear brake, and apply force to the pedals”. Either way: “Inspect to make sure the master link is fully engaged.”
Connecting rivet. This is the fiddly one, and Park Tool’s sequence is worth following exactly. “Each rivet is specific to the make and model of chain, so be sure to use the proper connecting rivet for your chain.” Then: “Lubricate the connecting rivet, and install the connecting rivet from the inside of the bike towards the mechanic.”
Driving it: “There will be two points of resistance as the rivet goes into the chain. The first will be as rivet begins to go in through the first cage plate. The resistance will let up as the rivet continues into the chain and will then ramp up again as the rivets begins to go through the second outer cage plate. Match the depth of the neighboring rivets.” Once the depth looks right, break off the pilot tip.
Why the direction matters— and this is the detail that shows the procedure was written by people who do it. Park Tool: driving the pin from the inside out means “the burr left after breaking off the pilot is now facing out from the cassette or cogs and cannot come into contact with any part of the drivetrain and make additional noise or cause any shifting problems”. A mystery tick after a chain change is often exactly this.
One exception, by brand. “For Campagnolo 11, 12 and 13-speed chains, once the pilot is broken off, the pin will need to be pressed further to complete installation”, using a chain tool with a peening anvil — Park Tool names its CT-15 — and pressing “an additional quarter of a turn”. If you run Campagnolo, a basic chain tool is not enough.
Step six: check for tight links, then lubricate
Park Tool: “Reinstall the wheel if previously removed and backpedal to inspect for any tight links. Repair as necessary by flexing the chain laterally at the tight link.” A tight link is a stiff joint that will not articulate round the derailleur pulleys, and it announces itself as a rhythmic skip once per chain revolution.
Park Tool’s own tool list for this job includes “chain lubricant”, and a new chain arrives with a factory coating that is a shipping grease rather than a lubricant in several cases. Our chain cleaning guide covers what to do about that, and the lube roundup covers what to put on. If you are planning to wax the chaininstead, a brand-new chain is the best possible moment to start — that page covers the stripping step.
What to do if it skips afterwards
Park Tool names the likely cause directly: “if you encounter any problems such as skipping, it could be a symptom of a worn cassette or freewheel cogs. Replacement of these components may be necessary if you have used an excessively worn chain for too long without replacement.”
That is the mechanism our chain wear page and skipping diagnosis are built around, and the reason the elongation thresholds are worth taking seriously: a worn chain reshapes the teeth it runs on, and once that has happened a new chain no longer meshes with them. If your new chain skips only under load on specific sprockets, the cassette is the suspect, and the cassette roundup sorts compatibility by the three numbers your bike already has.
Common questions
Can you replace a bike chain without a chain tool?
Only if the chain uses a master link, in which case master link pliers do the job — Park Tool’s procedure names the MLP-1.2 by model. It also publishes a tool-free way to close a master link: position it on the upper run of chain, apply the rear brake and push on the pedals. But a new chain almost always needs shortening to length, and that does require a chain tool.
How do I know if my chain has a master link?
Look for a pair of side plates that are different from all the others, often a different colour — that is Park Tool’s own identification: “Master links have a pair of unique side plates that are sometimes a different color.” A connecting rivet chain instead has one rivet that looks visually different from its neighbours.
Do I need to replace the cassette when I replace the chain?
Not if the chain was replaced on time. Park Tool warns that skipping after a chain change “could be a symptom of a worn cassette or freewheel cogs” from having run an excessively worn chain too long. So the answer is decided by what you did before, not by a rule — and it is the argument for measuring chain wear at the published 0.5% and 0.75% thresholds.
Which way should the connecting rivet be driven in?
From the inside of the bike outwards, towards you. Park Tool’s published reason is that this leaves the burr from the broken-off pilot tip “facing out from the cassette or cogs” where it “cannot come into contact with any part of the drivetrain and make additional noise or cause any shifting problems”.
How do I get the new chain the right length?
Match it to the old one rivet by rivet, lining up outer plates to outer plates or inner to inner — never one to the other. Confirm the old chain was correct first using Park Tool’s two-part test: on the largest sprockets the chain should make the shift with two slight bends at the derailleur pulleys, and on the smallest there should be no slack and the chain should not touch itself. If the old chain fails either test, size from scratch instead.
What is a tight link and how do I fix it?
A joint that will not articulate freely, which shows up as a rhythmic skip once per chain revolution. Park Tool’s fix is to backpedal to find it, then “flex the chain laterally at the tight link” — side to side by hand until it frees off.
Is a Campagnolo chain different to replace?
Yes, and it needs a different tool. Park Tool publishes that for Campagnolo 11, 12 and 13-speed chains the pin must be pressed further after the pilot is broken off, using a chain tool with a peening anvil — it names its own CT-15 — and pressed “an additional quarter of a turn”. A basic chain tool cannot complete the job.
Sources
- Park Tool — Chain Replacement: Derailleur Bikes. Every procedural quotation on this page: the master link identification (“a pair of unique side plates that are sometimes a different color”) and the permission to ignore it on a worn chain; the connecting-rivet warning to break “several rivets away from any connecting rivets already installed”; “ensure the chain tool pin is driving in a straight line into the rivet”; the length confirmation test (two slight bends at each derailleur pulley on the largest sprockets, no slack and no chain-on-chain contact on the smallest); the sizing rule “always match inner to inner or outer to outer” with the note that “old chains will lengthen as they wear”; directional side plates facing “out towards the mechanic on the drive side”; derailleur cage tabs; master link arrows and the brake-and-pedal closing alternative; “Lubricate the connecting rivet, and install the connecting rivet from the inside of the bike towards the mechanic”; the two points of resistance and “match the depth of the neighboring rivets”; the burr orientation argument; the Campagnolo 11/12/13-speed peening step and “an additional quarter of a turn”; “backpedal to inspect for any tight links… flexing the chain laterally”; and the closing note that skipping “could be a symptom of a worn cassette or freewheel cogs” — retrieved 5 October 2026
- Park Tool — Chain Length Sizing (the from-scratch sizing methods this page links out to rather than re-deriving) — retrieved 18 September 2026
- Park Tool — When to Replace a Worn Chain (replace at 0.5% elongation for 11-12 speed, 0.75% for 10 speed and under, 1.0% for single speed) — retrieved 8 August 2026
- Park Tool — Chain Compatibility, including the published nominal chain widths by speed count and the note that SRAM 12-speed Flattop chains are proprietary with larger rollers than a typical chain — both recorded on /workshop/best-bike-chain-tools — retrieved 18 September 2026
- Shimano CN-HG601 published listing claims (“for 11-Speed (Road/MTB/E-Bike Compatible), 126 Links (W/Quick Link, SM-CN900-11)”) — the stored live Amazon listing title from content/catalogue.json, as recorded on /components/best-bike-chains — retrieved 17 July 2026
- Google Autocomplete — “how to replace a bike chain” returns as a completion with “without a chain tool”, “chain link”, “single speed”, “without a master link”, “on a 10 speed”, “with a master link”, “chain pin” and “shimano” — retrieved 5 October 2026
Read next
- When to replace a bike chain
The published elongation thresholds that decide whether this job is due.
- How to size a bike chain
Park Tool's two from-scratch methods, for when the old chain was wrong.
- The best bike chain tools
Nine tools and master link pliers, ranked on published compatibility.
- The best bike chains
Which chain, by speed count — and the SRAM Flattop exception.
- Bike maintenance schedule
Where chain measurement sits among the other published wear limits.
- Why is my bike chain skipping
The diagnosis if the new chain skips on specific sprockets under load.
We haven’t ridden or tested any of the products on this page, and we don’t pretend otherwise. Read how we research — or tell us we’re wrong and we’ll log the correction.